Wavlink Halo Setup & Troubleshooting Guide in Detail
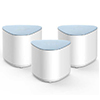
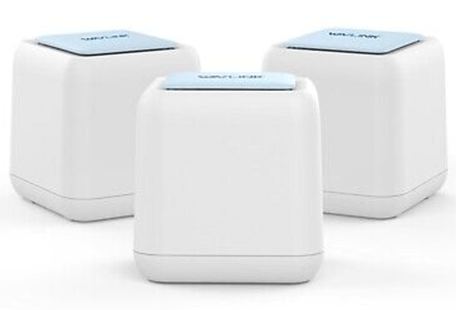
Wavlink Halo is a mesh WiFi system to convert your whole home into WiFi hub. The system consists of a main device with a few satellite nodes to create a single yet strong network. With the wavlink halo setup you need not to worry about the signal strength and network speed. The device offers a flawless network. At the same time, you can connect several wifi enabled devices to the network and enjoy flawless speed and coverage across all devices. The devices are equipped with internal antennas to transmit signals. In addition, its user-friendly setup makes the devices more approachable. You can also set up the mesh network at your home with Wavlink Halo by following our guide. This guide contains step by step instructions to not only setup the device but also to troubleshoot the error in case it occurs.
Wavlink Halo Light Behavior
You can easily begin with the setup after understanding the device light Behavior. As the LED lights indicate the changing status of the device, it’s necessary to know about it. Check the information given further to know the LED indicator of the halo device displays which light in what condition.
- Solid purple: In case the device is being activated the LED turns into solid purple in color.
- Solid blue: When the internet is connected to the device, it will show Solid Blue color.
- Blue flash: In case Touchlink is in progress or the Router mode device is being paired with other mesh devices, the LED shows flash blue light.
- Slow Red flash: When the device is not able to access the internet, its LED turns into slow red flash.
- Fast Red flash: When the device is disconnected the LED turn into fast red flash.
Wavlink Halo Setup Process
Wavlink halo setup is not at all a complex way to configure the device. One can perform setup & install device hardware very easily. There are two methods by which you can easily set up the wavlink halo mesh WiFi system. Both are detailed underneath. Also check out the installation process of device hardware.
Installation
Prior to begin the setup of the device, installation of its hardware accurately is mandatory. So, what are you waiting for, unbox your mesh system. Take out the halo nodes out of the box. With the halo nodes you’ll get the power adapter of all nodes and ethernet cable also. Start the installation:
- Take one of the halo nodes.
- Set it as a router and for that, connect it with your modem.
- Use ethernet cable to establish connection between modem and router.
- Thereafter connect the node to the power outlet by using a power adapter.
- As the LED turn solid purple, begin the below given Wavlink halo setup
App setup
You can initiate the app based setup by using your smartphone. Download the wavlink app from google app or app store as per your device system. Thereafter move further with below given steps:
- First of all connect the smartphone with the halo node network.
- Thereafter go to the app and then the app will prompt you to complete the process.
- While setting the system you have to add the additional satellites to the network.
- Also change the security details of your mesh network to protect from unauthorized access.
Web setup
Proceeding with Wavlink halo setup using the web is simple and straight. Use a computer/ laptop to proceed with this method of configuration. Go ahead with the underneath steps to complete the setup:
- First connect your computer/ laptop with the Halo’s network using ethernet cable or WiFi.
- Once connected, you need to go to the web browser you have. We advised you to use an updated version of the browser to avoid complications in the process.
- Go to the address bar, type wifi.wavlink.com or 192.168.10.1 and then use admin as your default password to access the settings.
- Thereafter choose Country/Region and Time Zone from the appeared screen.
- Complete the Halo node setup and also add the additional satellite nodes.
- Once the Wavlink halo setup completes, place the additional nodes to the different locations but with-in the range of the main node.
Wavlink Halo Troubleshooting
In case you encounter trouble with the Wavlink halo setup then try our troubleshooting tips. With our guide you can resolve your network related issues including slow internet, no signal, halo node flashing red etc.
- Verify the power supply of the halo device.
- Check for any damaged cable or loose connection.
- Restart your halo device.
- Also check for Firmware updates
- Reset it back to factory settings.
All these troubleshooting will resolve the issue you encounter, in case the problem precedes or you don’t know how to set up the halo network then feel free to connect our tech experts.
