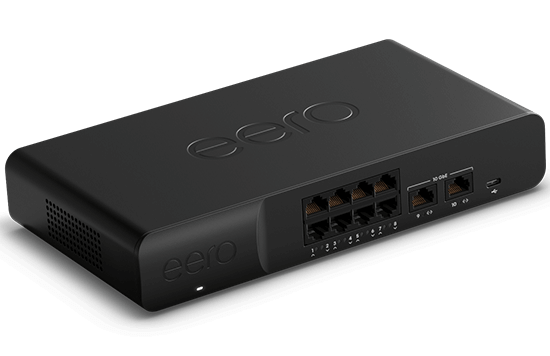
Let’s Quickly Set Up Eero PoE Gateway
The eero PoE gateway setup is the one that acts both as a router as well as a switch for an eero network. It comes with not one, not two but in total eight 2.5 Gbps RJ45 ports. Additionally you get two 10 Gbps SFP+ ports. These two ports support wired speeds of up to 9.4 Gbps. Whereas the other eight ports share upto 100 W of pooled power. The best part is that the eero PoE gateway setup is extremely easy with the help of free eero application. Moreover you can manage the whole eero network remotely just with the help of your smartphone. So let’s check out the whole setup process.
Installation Requirements
For a successful and smooth eero PoE gateway setup, you’ll need following components:
- One eero PoE gateway
- One 140 W USB-C power adapter
- Firstly, your smartphone with an active internet plan.
- Next, eero application
- Cable or DSL modem.
Overview Of LED Indicators
Each port comes with a smart LED light indicator. Here are the different depictions:
2.5 GbE Ports LEDs
If the port depicts a solid yellow light, then you are receiving the 10/100 Mbps speed. Whereas the solid green and solid cyan light depicts the 1000 Mbps and 2500 Mbps speeds respectively. Coming to the flashing blue light, it means the PoE power budget is exceeded. Whereas no light means nothing is plugged in.
10 GbE Ports LEDs
Each light on the 10 GbE port depicts the same meaning as mentioned above. But there are two more additions here. That are as follows:
- A solid white light depicts 5000 Mbps speed.
- Lastly, a solid fuschia light depicts 10,000 Mbps speed.
Eero PoE Gateway Setup Guide
Setting up eero PoE Gateway is an extremely straightforward and quick process. It is all because of the free eero application.
Initial Steps:
- Firstly, pick your smartphone, move towards the Google Play Store or an App store depending upon your device.
- Now search for the eero application and get it on your device.
- After that, you need to login into the app or simply create an eero account.
- You can use your Amazon account information for login. Whereas to create an eero account, you need to fill up the phone number and email id. You’ll receive the verification code. Now for eero PoE gateway setup you need to enter this code in the eero app.
- Now to set up eero Gateway, first detach the existing modem and router from the power socket. Thereafter, use the ethernet cable and plug the eero gateway to the modem. At last, plug in the modem as well as the PoE gateway into a power socket.
- Turn on the entire eero PoE gateway setup. A blinking white light will pop up on the eero gateway. Now your aim is to turn this blinking white light into solid blue light.
Final Steps:
- Moving further, revisit the eero app, and tap on Next. As you do this action, the eero app will start the detection of the eero gateway. Once detection completes, you’ll see the solid blue light.
- In some cases eero app might ask you to fill up eero’s serial number. In this case, just find out the product label, usually pasted on the back panel. On it you can check the serial number.
- Now you have to select a location name for the eero. After this fill up the new network name or as you call it SSID and password. Finally, tap on Next and the eero PoE gateway setup completes here.
- At last connect your eero devices to the gateway and enjoy seamless connectivity.
Placement Matters !
To make the best use of your eero devices, strategic placement is extremely crucial. Here is expert advice that you can consider.
- Central location is the ideal placement spot for eero.
- Next, keep the eero in an open and well ventilated space. This means the eero shouldn’t ve placed behind a heavy furniture set, inside a box or between thick concrete or mirror walls.
- To avoid blocking signals of your eero, do not place it near or on top of electronic and metal objects.
- To get the best experience, consider placing the eero on an elevated surface.
Concluding Remarks !
Eero PoE gateway setup is unique as it can act both as a router as well as a switch for eero network. The eero app further adds a cherry on top. Because it makes the installation extremely easy and quick. Moreover the management of eero network becomes easier with the app. By following the step-by-step instructions, even a non-tech individual can set up the gateway within seconds. For any other query feel free to connect to our experts.