Gunceng Extender Setup Tips and Tricks
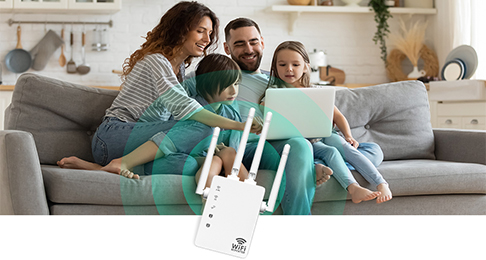
Are you tired of dealing with dead zones and slow wifi signals? Not anymore! We have a great solution for you. You can deal with connectivity issues effortlessly when Gunceng extenders are by your side. In this detailed guide, we will discuss the Gunceng extender setup because setting up the extender correctly contributes a lot to improving your wifi experience.
Tips to Ensure Smooth Gunceng Extender Setup
- Understand Your Network Layout:- Understanding your network layout is the essential step in getting the best connectivity. Therefore, you should know the areas in your home or office where you experience weak wifi signals. This will help you determine the optimal position for your extender to ensure maximum coverage and performance.
- Find the Best Place:- The placement of the extender plays a crucial role in determining its performance. So, positioning the extender in the areas where the connectivity is strongest is a wise decision. By doing this, you can get better wifi signal strength in the areas of poor connectivity. Try to avoid areas with obstructions like walls, furniture, etc.
- Carefully Follow the Gunceng Extender Setup Instructions:- After finding the perfect spot for your extender, it’s time to carefully accomplish the setup process by following the instructions given in the user manual. The setup process is easy and the user-friendly interface guides you step by step. But, you have to make sure that the extender is properly connected to the existing wifi network.
- Optimize Settings for Performance:- The initial setup has been done, time to optimize the setting for optimal performance. Here you can adjust the channel settings, enable advanced features, and update firmware. These help to improve the speed and stability of your wifi connection.
Gunceng Extender Setup Complete Process
Verify What’s Inside the Box
Begin the setup process by unboxing the extender. Carefully check all the necessary components like the extender unit, power adapter, ethernet cable, and user manual and inspect them for any damage.
Place it Strategically
First of all, identify the areas in your home or office with weak wifi signals. The best strategy is to place the extender between the router and areas experiencing poor connectivity. Keep your extender away from obstructions like walls, furniture, electric appliances, and other similar objects that interfere with the wifi signals.
Power On the Extender
To power up your extender, plug it in the power outlet using the power adapter and place it near the router. You have to wait for a few minutes and check the LED indicators, if they are blinking it means your extender is receiving adequate power supply.
Establish a Connection with the Devices
Now use your device either smartphone or PC to connect to the default wifi network broadcasted by the extender. The network name and password are given in the user manual or on the sticker attached to the extender.
Access the Login Page
When you connect your device to the extender’s wifi network, choose your desired browser, open it, and either using Gunceng’s official website or IP address, launch the extender’s setup wizard. There are various instructions given on the setup wizard, follow them and complete the configuration process.
Customize Settings
Here you have the chance to customize your settings where you can change the default network name and password. And it is a good move to change the default credentials for security concerns. You can also access advanced settings using the extender interface like wifi channel selection, security options, and so on.
Complete the Setup
Once you have entered the required information, the setup wizard will apply the settings and establish a connection between the extender and the router. Now reboot the extender to finalize the setup process.
Test Connectivity
After finishing the Gunceng extender setup process, test the connectivity in previously problematic areas in your home or office. Check wifi signals in these areas whether they have improved or not.
Troubleshooting Tips
If you encounter issues during the setup process, you can refer to the troubleshooting section of the user manual. Let’s discuss some of the troubleshooting tips to resolve common issues.
- When you are facing connectivity issues, the power cycle is the effective method to resolve this issue. Simply unplug the extender, wait for 30 seconds, and plug it back.
- Cross-check all the cables connected to the extender and the router. Because loose connections also lead to connectivity problems.
- If you are living in densely populated areas with numerous wifi networks, this could affect your signal strength. So, it’s better to change the wifi channel to a less congested one.
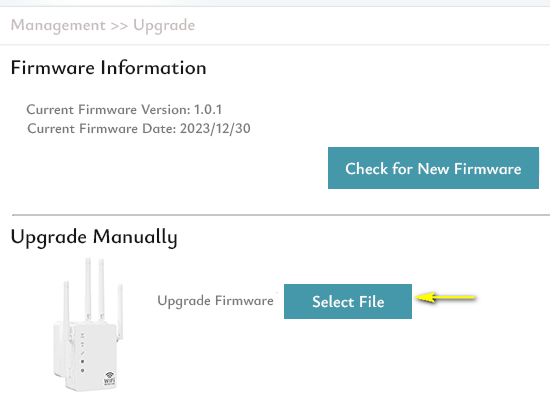
- Firmware updates are essential for fixing bugs and improving performance. Therefore, keep checking the firmware updates.
- When everything fails, reset your extender to its factory settings. You can do this through the reset button available on the extender. Press it and hold for a few seconds to initiate the reset process.