Brostrend Extender Setup

Live Chat

Struggling with a technical issue? Write to us right away. Our support team often responds quickly.

OR

Don’t want to wait? Call us right away.

    How To Login And Configure Brostrend Extender?

    Brostrend extender device helps extend the WiFi signal range in your home or workplace. The login and configuration process of the Brostrend extender is uncomplicated. You can easily do the login and configuration process by yourself without taking any help from a tech expert. To know more about the login and setup process of the Brostrend extender, follow the below directions.

    Advantages of Using Brostrend WiFi Extender

    • The main advantage of the Brostrend extender helps to increase the range of WiFi signals.
    • With this gadget, you can connect multiple WiFi gadgets.
    • Place at any location of your house or office.
    • The installation process of the Brostrend extender is uncomplicated.
    • From any offline or online store, you can purchase it at an affordable price.

    Access Brostrend WiFi Extender Web Management Page

    Initially, take a cell phone to start the login process of the Brostrend extender. After that, place the Brostrend WiFi range extender power plug in an electrical socket. Now, the power LED starts flashing. Further, open the WiFi settings on your WiFi device and connect the WiFi device with the Brostrend Extender default WiFi network. Later, on a connected device type an IP address 192.168.0.254 in the address bar. Further, fill in the information that is asked of you on the login page. In the end, hit the login button to complete the Brostrend WiFi range extender login process.

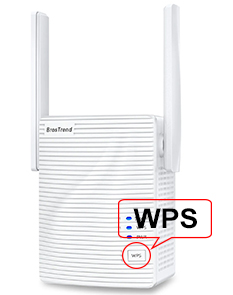
    Setup Brostrend Extender By WPS Method

    Initially, place the Brostrend extender power plug in an electrical socket near the host router. After that, look for the WPS button on the Brostrend extender and the existing router. Now, press the WPS button of the Brostrend extender and within 2 minutes press the existing router WPS button. By doing this, on both units, the WPS LED starts blinking solid. It means your both extender and router unit are successfully linked.

    Note:- In case your existing router does not support the WPS button and you are unable to do the Brostrend extender setup by the WPS method. Then don’t worry, try another method to do the configuration process.

    Brostrend Extender By WPS Method

    Configure Brostrend Extender Without WPS Button

    Initially, near to your existing router place the Brostrend extender power plug. After that, press the Brostrend extender power button to turn it on. Wait for 30 seconds to boot up the extender. Later, connect the computer to the Brostrend WiFi range extender default network. Next, launch the Internet web browser and type 192.168.1.1 in the address bar. Click on the start option which is at the bottom and follow all the display instructions. After the configuration of an extender without the WPS method, then place the extender at the optimum location. Make sure that your extender is not placed near the metal or electronic appliances. In the end, connect the WiFi gadget such as a cell phone, computer, laptop, PC, etc with the Brostrend extender network after completing the configuration process.
    After doing the Brostrend extender setup process by following the directions of the apart two methods, if you face any error such as the extender not working properly. Try the below solution tip to fix the error of your device.

    Solution Tip To Resolve Brostrend Extender Error

    Place Brostrend Extender At the Best Location

    The central location of your house or workplace is always the best to place an extender. Make sure when you place the extender it doesn’t be placed closer to the metal or electronic appliances. Electronic types of appliances absorb the WiFi signals that come from the extender or router.

    Download the Latest Version Of Software

    To download the latest software version, you will be required to go to the Brostrend web management page. For this, your computer must be linked with the Brostrend default network. Now, open the browser and enter rebrostrend.com in the URL bar. Further, fill in the information and then hit the login button. Later, click on the network administrative option and then select the software upgrade or installation button. In the end, install the file to finish the latest software file installation process.

    Power Cycle Brostrend Extender

    Press the Brostrend extender power button to power off. After that, take out the power plug of the Brostrend extender from an electrical socket. Wait for a few seconds and place back the extender plug-in socket. At last, punch again the Brostrend extender power button to power it on.

    Reset All Default Settings

    To do this solution process, take a paper pin. After that look at the reset button and insert the pin in the reset button. Later, all the Brostrend extender LEDs will be powered off. The all-power-off LEDs indicate that your Brostrend extender is completely reset now.

    Note:- Do the login and setup process again, after resetting the extender.

    After the whole study of this post if you are unable to do the login and setup process of brow trend extender or facing any error then simply get help or advice from our tech expert. They will help you.