WL WN583AX1 AX1800 Setup- Comprehensive Information
Purchased WL WN583AX1 AX1800 device but confused about its setup? Don’t worry, you are at the right page, here you’ll get detailed information. This page contains WL WN583AX1 AX1800 setup instructions step by step along with other important information. Check out the guide to configure your device to enhance your home or office network.
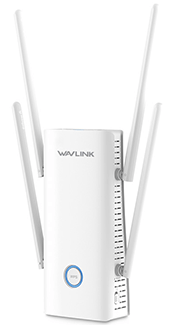
Before diving into the setup process it is important to know the device very well. WL WN583AX1 AX1800 device is a range extender. This device enhances the signals of your existing network. It takes signals from your router and then re-broadcast them. With the WL WN583AX1 AX1800 setup of the device you can eliminate the weak signal zone or no signal zone at your home or office.

WL WN583AX1 AX1800 Specifications
You should know the specifications of the device prior to moving towards the WL WN583AX1 AX1800 setup. Here is the details:
- For better capacity and efficiency, the device supports WiFi 6 standards and 80MHz bandwidth.
- Further it has dual band frequency 2.4G offering 573 Mbps plus 5G offering 1201 Mbps with the aggregated speeds up to 1800Mbps.
- The device has 2 ethernet ports, smart signal indicators, high performance copper antennas and Advanced TWT Resource Management.
- Advanced technology has been used including WPA-PSK/ WPA2-PSK/ WPA3-PSK encryption, More Bandwidth with MU-MIMO and OFDMA and BSS Colouring Technology
- You can easily switch between Range Extender / Router / AP mode.
- Moreover its setup is also a very easy and straightforward process.
Wavlink AX1800 Setup Preconditions
You should fulfill the WL WN583AX1 AX1800 setup preconditions as mentioned here:
- Firstly you need WL WN583AX1 AX1800 device with power adapter
- Find an adequate location for your device.
- Thereafter you need to plugin the device power adapter in the device and then connect it with the power outlet.
- Switch on the power and monitor the device power LED.
- Wait till the LED stops blinking and turn solid in colour.
Wavlink AX1800 Setup Steps
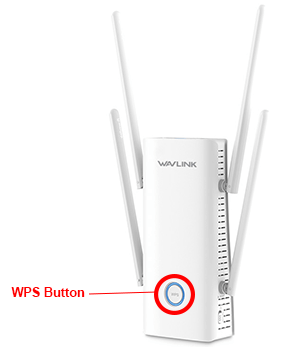
WL WN583AX1 AX1800 setup is possible by using WPS button as well as web interface. You can set this device in three different modes as per your requirement. Step by step instructions to do the setup may include following:
WPS Based
AP Mode
- You need to press the WPS on your router device first.
- Thereafter press the WPS on the extender for about 2 seconds.
- This will connect your extender with a downstream device in AP mode.

Repeater Mode
- You need to press the WPS on your router device first.
- Thereafter press the WPS on the extender for about 2 seconds.
- This will connect your extender with a downstream device
- Hold it for 8 more seconds and connect to the upstream router.
Mesh Extender and Mesh Router Mode
- You need to press the WPS on your router device first.
- Thereafter press the mesh pair button on the extender and hold it for about 2 seconds.
Web Based
AP Mode
- Firstly open the browser in your client device
- Type “waplogin.link” or “192.168.10.1” in the address bar
- Click on the begin configuration option, select your country/ region and time zone and choose the WiFi mode as AP mode
- Now select “select WiFi”, click on the next option and enter the password of your wireless network.
- Now choose wireless network encryption mode and password for your new network.
- Choose the save option at last.
Repeater Mode
- Firstly take a client device and launch a web browser of your choice (such as Chrome, FireFox etc.)
- Rush to the address bar and type “waplogin.link” or “192.168.10.1”
- Then click on the begin configuration option and select your country/ region and time zone.
- Afterwards, select the WiFi mode as repeater mode
- Select the “select WiFi” option, thereafter press on the next option
- Enter the password of your wireless network.
- Now choose wireless network encryption mode and password for your new network.
- Save the changes at last by clicking on save option.
Mesh Extender Mode
- Firstly open the browser on your laptop/ computer of your choice (such as Chrome, FireFox etc.)
- Go to the address bar and type “waplogin.link” or “192.168.10.1”
- Then click on the begin configuration option and select your country/ region and time zone.
- Thereafter select the WiFi mode as Mesh extender mode
- Choose “select WiFi”, click on the next option and enter the password of your wireless network.
- Now choose wireless network encryption mode and password for your new network.
- Choose the save option at last and complete the configuration.
Mesh Router Mode
- Firstly, open the browser in your client device (Laptop/ Computer)
- Go to the address bar and type “waplogin.link” or “192.168.10.1”
- Then click on begin configuration option
- Now, select your country/ region and time zone.
- Select the WiFi mode as Mesh router mode and then select “select WiFi”
- Click on the next option and enter the password of your wireless network.
- Now choose wireless network encryption mode and password for your new network.
- Choose the save option at last to submit the changes.