WL WN575A3 AC1200 Extender Setup- Quick Start Guide
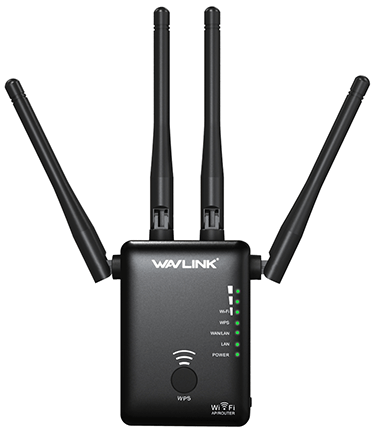
In today’s world we all need a reliable home network to perform a handful of professional and personal activities. You can transform your home into WiFi haven with the setup of a single device called WL WN575A3 AC1200 Extender. It is a dual band wireless device which you can use on AP mode, Range Extender mode and Router mode as well. The device is compatible to offer 1167 Mbps of total bandwidth via both frequencies (5GHz- 867Mbps and 2.4GHz- 300Mbps). Its compact design makes it more convenient to install. The device has one LAN and one WAN port with four LEDs to indicate power, WPS, WiFi signal and WAN/LAN connection. However, four external antennas are used to transmit signals across the space. With the WL WN575A3 AC1200 Extender setup you can get a reliable & robust network.
People often think that the setup process is a little complex but in reality it’s not. You just have to follow a few steps to do the setup. Detailed setup instructions to quickly install the device are mentioned underneath, check the process and complete the setup.

WL WN575A3 AC1200 Extender Setup Process
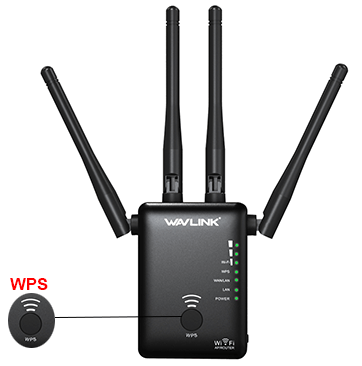
WPS Button Based AC1200 Extender Setup
Unbox & Start The Device
- Firstly, unbox your WL WN575A3 Extender device very carefully.
- Take out the device and look for an ideal placement to complete WPS based WL WN575A3 AC1200 Extender setup.
- Keep the device next to the router and plug-in it in the power outlet.
Start Configuration

- To configure, locate the WPS button on the router and extender devices.
- Press and hold the WPS button of the extender device first for about 6 seconds.
- Thereafter press the WPS of the router device within two minutes.
- You’ll notice the WPS LED of the device starts blinking very fast.
- Let the process complete and wait till the extender device will reboot itself.
Web Based AC1200 Extender Setup
Unbox And Start The AC1200 Extender
- Firstly, unbox your AC1200 extender device and take out the device.
- Then look for an ideal placement to complete the setup.
- We advised to keep the extender device next to the router and plug-in it in the power outlet.
Connect The Client Device
- Now you need a client device such as a laptop/ computer and connect it to the extender’s network.
- To do so, you need to move ahead and go to the WiFi settings in your client device.
- Now look for “WAVLINK-N” or “WAVLINK-AC” networks and connect to them.
- Use admin, your default password to connect with the network.
Access Setup Wizard
- Once you are connected with the network successfully you need to launch a web browser of your choice.
- Thereafter go to the address bar and search for “192.168.10.1” or “http://wifi.wavlink.com/” web address
- As you search the login page will display on the screen, login to the site by using admin in both fields.
- Hit on the login option afterwards and you can access the setup wizard.
Configure Your AC1200 Extender
- To configure your AC1200 extender device, follow the setup wizard.
- Click on start setup option and follow the guide as setup wizard provides.
- You should choose your existing home network and provide its password too
- Let the device connect by clicking on connect option and set your new network SSID & password.
Test Your New Network
At last, check your new network by surfing the internet. You can check the connection from different areas of your home. If needed then relocate the device to enhance its performance.
During the setup process, if you feel you need technical assistance then feel free to connect to the Tech Support Hub Wavlink Support team. Our technicians will assist you with the setup process and also guide you to troubleshoot issues. Connect on the number we have mentioned above. Hurry!