A Quick And Simplified Eero PoE 6 Setup Guide
Eero PoE 6 is a wifi 6 access point that provides maximum coverage of up to 2,000 square feet. The best part about Eero PoE 6 setup is that it can support more than 100 devices. Moreover it supports 160 MHz channels and provides magical speeds of upto 1.6 Gbps. You can easily mount it on walls and even on ceilings. Additionally the Eero PoE 6 uses Power over Ethernet cables therefore you do not need seperate power supply. So get ready to enjoy wider and seamless wifi coverage with Eero PoE 6 setup.
Eero PoE 6 Setup Instructions
For a successful setup you first need to unbox the package contents. As you unpack you get one Eero PoE 6, one mounting bracket, four 30.0MM drywall anchors and lastly four phillips screws. Apart from this, for the Eero PoE 6 setup you need an internet connection, modem, Cat5e ethernet cable and lastly a smart device.
LED Light Indicators- Overview
Eero PoE 6 comes with smart LED light indicators. These indicators help users in understanding the exact working of the Eero. Moreover it makes the Eero PoE 6 setup process extremely easy. Here are different meanings of different LED’s:
- No light means Eero doesn’t have a power supply.
- A blinking white light indicates that the Eero’s software is starting up or it is connecting itself to the internet.
- Thereafter a blinking blue light means Eero is broadcasting bluetooth whereas the solid blue light means Eero app is connected to your Eero and is setting up.
- Additionally, a flickering green light means multiple Eero devices are detected.
- A blinking yellow light is a sign that the Eero is not getting sufficient power.
- Lastly, a stable white light depicts the successful connection of Eero with the internet. Whereas a solid red light tells the opposite. It means Eero is not connected to the internet.
Installation Guide
Eero PoE 6 setup is simple and easy to perform, all thanks to the Eero application. Here are the step-by-step instructions for a quick setup:
Download The Eero App
Firstly, pick your smartphone, head towards the Google Play Store or an App Store. Search for the Eero app and get it on your smartphone. Be mindful that you download the latest version and authentic application.
Create Your Eero Account
Now it’s time to create an Eero account. Now there are two methods. First you can login into the Eero account by using your Amazon account information. In the second method, fill your email address and phone number. As you do so, you’ll receive the verification code. Now all you need to do is use this code to create the Eero account. The second step of Eero PoE 6 setup is now over.
Time To Set Up Eero Gateway
The Eero app will guide you on how you can set up the gateway. It is a process of three simple steps:
- Start by detaching the modem and the router from the power source. Also, disconnect other devices that are using the modem.
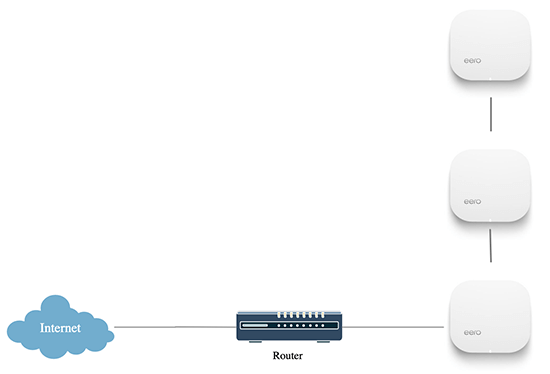
- Thereafter, connect the gateway Eero device to the modem. Use the provided ethernet cable for the same. For the connection you can use any of the ethernet ports that are present at the back panel of the Eero.
- Now plug the gateway Eero device into an electrical outlet and after that plug in the modem as well. Turn on the entire Eero PoE 6 setup. As you turn on, you’ll see a flashing white light. To solidify this light, follow the next step.

Create Your Eero Network
It’s time to revisit the Eero app. Tap on Next. As you do so, the application will start detecting the new Eero setup. As it detects successfully, the blinking white light will turn into solid white light. Now the all will prompt you to tell select the location of your Eero. After you select the location, enter the new network name and password. Now to complete the Eero PoE 6 setup tap on Next.
Note: Sometimes you may be asked to fill up Eero’s serial number. In this case do not panic, just check the product label of your Eero and there you’ll find the serial number.
Connect Your Eero Device's To The Eero Network!
As the Eero PoE 6 setup completes, use the new password to connect your devices. In case you are having trouble connecting, then first turn off wifi and reconnect. If still the issue persists then reboot the devices for refreshing the connection. Do not forget to check the LED light indicators to know about the exact working of your Eero. Placement is extremely crucial for the Eero to work perfectly. So place the Eero centrally and in an open space for easy communication with your devices. Moreover keep the Eero away from larger metal and electronic gadgets as these devices can act as a major culprit in how the network performs.