Eero WiFi Extender Setup Process: In Depth Details
Wish to enhance your existing eero network signal strength or desire to set up an eero network? Read out the process breakdown we specified in the further section to accumulate the in-depth details on eero extender setup.
Eero WiFi extenders are an excellent solution for enhancing your home network’s coverage and performance. Whether you’re dealing with dead zones or want consistent WiFi strength throughout your home, eero WiFi setup is perfect for you. You can add on eero as your home networking device very easily. Setting up an Eero WiFi extender is a straightforward process.
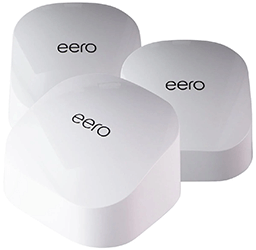
What is an Eero Extender?
Requirement Of Eero Extender Setup
- An android OS version 9.0 or IOS version 15.0 mobile device.
- Eero iOS app or Android app
- At least one eero with ethernet ports
- Working mobile data connection
- Internet service provided into your home
Step By Step Eero WiFi Setup
Unbox, Place and power
Download The Eero App
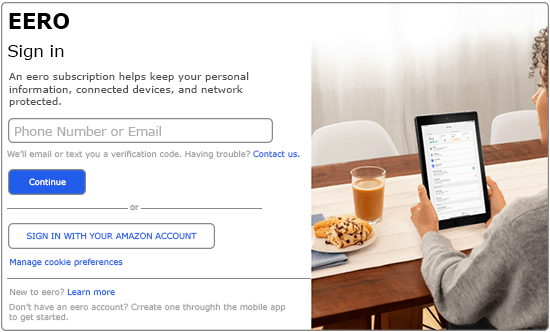
Create An Eero Account
- First of all, choose New to eero? Button.
- Further page will display with following two options:- Use my Amazon account, Continue with your email or phone
- Opt any of the above said options as per your preference.
- Follow the screen guide to create your account and also verify your contact details.
Set Up Your Eero
- Select the start setup option and then confirm the items displaying on the screen.
- You must have all of the items to configure your device.
- Thereafter select the start option and disconnect your modem/ router device from power.
- Tap on the blue eero and continue the hardware setup by connecting your eero extender to your router using the provided ethernet cable.
- Choose the blue arrow shown on the app screen and then power up your devices.
- Firstly plug in the eero extender and then your modem/ router.
- Again choose the blue arrow and wait till the app recognizes your device.
Create Your Eero Network
- Once the app shows the device, choose the location to keep the device.
- Next you have to create a name for your wifi network to continue the eero wifi extender setup.
- Also create a password for the network and then choose the blue arrow
- You will receive a confirmation of successful setup on the screen, choose the blue arrow again to move ahead.
Add Eero Extender To Your Network
- Now the app screen will display two options as mentioned: Add Another eero Device, Finish setup
- If you want to add another device then opt for “Add Another eero Device” option
- Home page of the app will display from where you need to select the add sign option mentioned in the top right corner.
- Further opts will appear on the screen select Add or Replace an eero device option from there.
- Another screen opens, choose Add eero Device and then plug in the eero device you have into power.
- Hit on the next option and then wait till the app recognizes your device.
- Select the location to keep your eero and the device is successfully added to the network.
- Add more additional devices by following the mentioned steps.
- If no device is left to add further, choose the finish setup option.
Test Your New Network
Lastly you need to test your new eero wifi extender setup. To check it you need to select the “activity” tab in your app. Thereafter opt for a tile on the Internet section. Next you have to select the run speed test button to check the network speed.
By following the above mentioned breakdown of eero wifi setup you can easily configure the device. The steps involved in the setup process are very simple to initiate. Yet if you got stuck anywhere in between the eero extender setup then feel free to connect tech support hub’s support team. Our representatives will guide you with the process. You can connect our eero support team on below available contact numbers. Also you can leave a query in our chat section. Our team will assist you with the issue instantly. Furthermore the experts will guide you with any troubleshooting required to resolve the problem. So, what are you waiting for? Call now!
