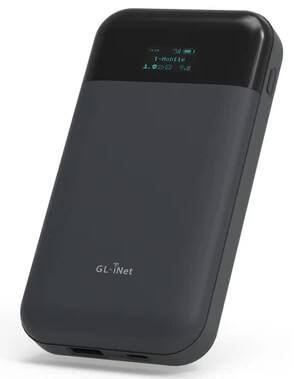
MUDI (GL E750V2) A Portable 4G LTE Router Setup
GL E750V2 is a portable router with dual band technology. With 2.4GHz, it offers speed up to 300 Mbps whereas with 5GHz frequency 433Mbps. The device supports multi WAN to offer smooth connectivity. In addition it has a 7000mAh battery that provides 8 hours per charge usage. A pocket friendly device that enhances your network coverage and security too. Furthermore, the device has a micro SD chip for storage capacity up to 1TB. In short its setup will enhance your overall experience. Now the question arises how to proceed with the GL E750V2 Setup? Is it easy to configure? Does it require any technical expertise? Answers to all such questions are on this page. Just read out the information till last to know the step by step setup.

MUDI V2 Unboxing
Before receding towards GL E750V2 setup, it is significant to know what exactly you get with the device. MUDI V2 device box contains:
- Mudi V2 (GL-E750V2) portable 4G LTE router
- Power adapter
- Four Converters (US, EU, UK & AU plugs)
- User manual
- USB-C port replicator
- Ethernet cable
- USB-C to USB-C cable
- USB-A to USB-C cable
GL E750V2 Setup Steps
Once device unboxing is done, you have to proceed with the setup. Setup steps to follow:
Insert a SIM Card & MicroSD card
Firstly, you need to insert a SIM card in the device in case you desire to use cellular network. Slot to insert the SIM is on the back side of the device. Remove the cover plate first, insert the SIM and close it. Also you can insert the MicroSD card in the given slot. Both the slots are given under the same cover plate. Inserting the MicroSD card is completely optional.
Power On
Turn on the power now by pressing the power button on the device. Use a 5V/2A power adapter to charge the device in case the battery is low. You can check the battery status on the device LED.
Internet
- Once the device is turned on, configure it by using the web admin panel.
- To access the web admin panel you need a computer/ laptop.
- Connect it to the device network by using ethernet cable or WiFi settings.
- Afterwards, go to a web browser to browse the admin panel.
- Go to the search bar of the browser and type “http://192.168.8.1” default IP.
- Click on enter option and this will open the admin panel.
- To get the access complete the initial setup by choosing the language and creating a password for the admin panel.
- Once done click on the next option and move ahead towards GL E750V2 Setup.
- Go to the internet option and four options will display on the screen to connect your device with the internet.
- Opt any one of them to proceed the setup and follow the screen instructions.
- Afterwards choose the “apply” option to complete the setup.
- Check your new network and also make changes in the network password.
GL E750V2 Setup Troubleshooting Steps
Many times we often face issues with the networking devices. These issues can be resolved very easily. To resolve the errors you might encounter with your GL E750V2 Setup, try further the troubleshooting guide. Troubleshooting steps mentioned here may resolve your issue within a few minutes.

Restart the Device
Sometimes, the problem we face is temporary. It can be resolved with a simple rebooting of the device. Rebooting may involve following steps:
- Turn off the device power by pressing the power button on it.
- Wait for about 2-3 minutes and then again press the power button.
- Once the device turns on, you’ll notice the power LED turn on.
- In case it doesn’t resolve your problem then try the next step.
Update the Firmware
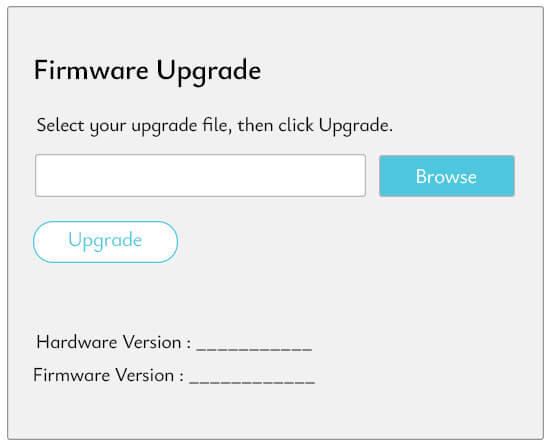
Firmware plays a very vital role in smooth running of the device. Manufacturer’s release the firmware from time to time to fix bugs. Keeping the firmware up to date will resolve all the issues created by outdated firmware. You can update the firmware via online method or via local file upload method. Steps in both methods are mentioned below.
Online Upgradation
Follow the mentioned steps to update it:
- Access the web admin panel of the device.
- Go to the system and then upgrade options.
- Go to online upgrade section
- Check if the firmware is up-to-date or not.
- In case an update is pending download it.
- Install the update by click on install option
Local Upgradation
Follow the mentioned steps to update firmware via local upgrade method. To pursue this method you need to download the firmware file first from the official portal. Thereafter you need to proceed the further steps:
- Firstly, access the web admin panel of the device.
- Go to the system and then upgrade options.
- Thereafter go to local upgrade section
- Drag the file of firmware you had.
- Install the update by click on install option