A Complete Guide On GL.iNet’s Beryl Setup
GL MT1300 is a compact pocket-sized and travel friendly router from GL.iNet. It is popularly known as Beryl. So if you also got your hands on this magical product and are looking for the GL MT1300 setup process, then you are at the right destination. Additionally, the guide covers everything from features, hardware overview to the setup requirements. But in case you are not sure whether you’ll be able to complete the setup independently, then it’s advisable to seek the help of experts. As otherwise you might end up destroying the hardware of the router. So without any more delay, let’s dive deeper.
Feature Set Of GL MT1300 Router
This router from GL.iNet comes with a vast set of features.
✓ Dual-Bands
The GL MT1300 setup operates on dual-frequency bands. It consists of one 2.4Ghz band that offers fast speeds of upto 400 Mbps. On the other hand the 5Ghz band offers speeds of upto 867 Mbps. The availability of dual bands offers less congestion and more bandwidth.
✓ Gigabit Ethernet Ports
Moving further the GL MT1300 router consists of not one or two but in total three ethernet ports. Through this you can achieve a stable and direct connection for your various peripherals.
✓ USB 3.0 Port
For easy and quick file sharing you can use the USB 3.0 port. Moreover after a successful GL MT1300 setup you can easily connect upto 40 devices simultaneously.
✓ Open VPN and WireGuard
Security is the top-most concern of every individual. Therefore Beryl does not disappoint you in this field as well. As it provides best encryption and authentication through Open VPN and WireGuard. With Web UI 3.0 you can easily setup a VPN server and therefore access the files securely in a remote site.
✓ Pre-Installed Tor
Moving further, Tor is pre-installed in the GL MT1300 router. Therefore, with the help of this you can easily hide your online identity as well as your browsing data from the third parties. So with Tor you get to add another layer of security.
Hardware Overview
For a smooth and uninterrupted GL MT1300 setup, it’s important to learn about its hardware.
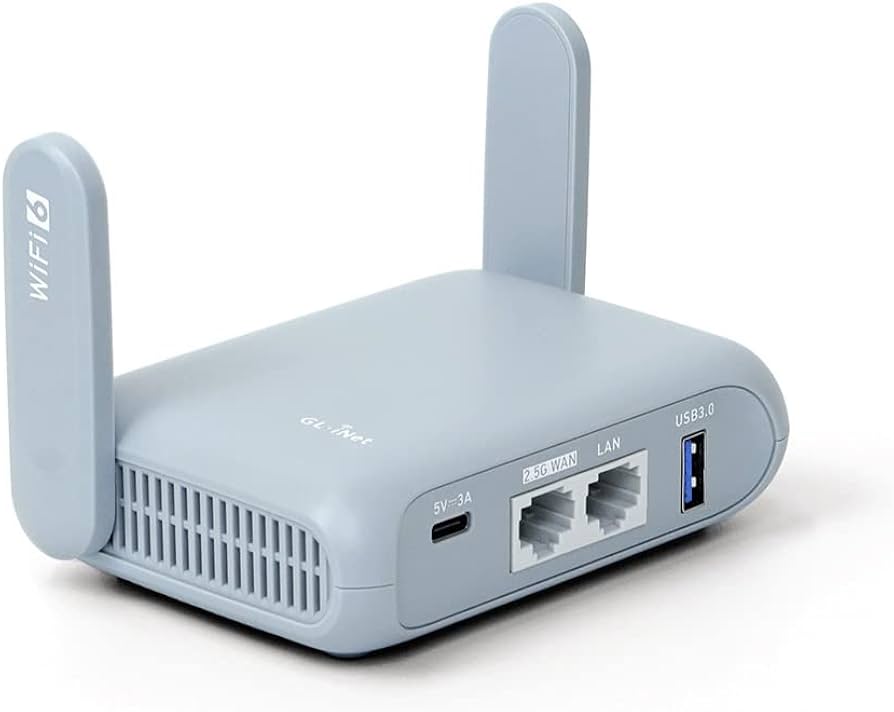
So first the router comes with two non-detachable antennas. These antennas help with stable signal transmission. Thereafter moving to the back panel of the router, you get three ethernet ports. Following it is a USB 3.0 port and a Type-C power port. Whereas on the side panel you’ll find a reset button and a mode switch button. On the other side panel there is a Micro SD card slot. Lastly the front panel consists of a smart LED light. In which the white light signifies the proper working of the GL MT1300 setup.

Setup Requirements
First begin by unboxing and collecting the package contents. Inside the box you’ll find the following components:
- GL MT1300 router
- Next, an ethernet cable
- Thereafter a power adapter
- A quick user guide alongside warranty and thankyou card.
It’s advisable to have a quick glance at the user manual. As it contains some important information like default password and IP address. This will come in handy during the GL MT1300 setup process. Moving forward, apart from the package contents the setup requirements are:
- A smart gadget like computer system, laptop, smartphone or an iPad.
- Next you need a power socket that functions properly.
Note: In case you already tried the GL MT1300 setup steps but could not complete it properly, then before you pursue with the fresh setup, you should perform a factory reset. As this brings back the router to its original settings. For factory reset first ensure the router is on. Thereafter with the help of a paper clip or an object that is similar to it, push and hold the reset key. You need hold it for atleast 5 to 8 seconds. Upon release the router resets. Therefore you can now continue with a fresh setup.
GL MT1300 Setup Steps
Setting up GL MT1300 is quite easy and does not involve any complex or time consuming procedure.
✓ Turn On
First carefully place the router in an open space away from metal and electronic items. Now fetch the power adapter. Attach its pin to the the power port of the GL MT1300. Thereafter plug in the adapter to a properly working power outlet. Turn it on. Wait for not less than a minute as the router boots up itself.
✓ Connect
Moving further, grab any of your smart gadgets. To initiate the GL MT1300 setup, you need to connect this device to the router. For this you have two alternatives. For a wireless connection search for the default SSID of the GL MT1300 router and fill up the password. The same details are written on the router’s label. Although the username is GL-MT1300-XXX or GL-MT1300-XXX-5G and the password is goodlife.
Where if you want a wired connection that is stable and reliable then use the eternet wire. Pass the cable from the LAN port of the GL MT1300 to the ethernet port of your host device.
✓ Open Admin Panel
Now as the device is connected successfully, open a web browser. Hop on to the address field. In it enter http://192.168.8.1. As you press the Enter key, you get access to the setup page. First select the language and hit Next. Now you’ll be prompted to setup admin password. As you do so, tap on Submit. For complete security, create a password that is a mix of numbers, letters and special characters.
✓ Connect To The Internet
Now from the admin page select Internet option. You get to choose between four different connection methods that are, Cable, Repeater, 3G/4G modem and tethering. As you select the desired option, all you need to do is follow the on-screen prompts one by one. Lastly, as the GL MT1300 setup completes, you’ll see a solid white light on the front panel of the router.
For any query, issues or assistance feel free to get in touch with the experts. For immediate help, choose phone support. Alternatively you can select between email and live chat support as well.