Linksys RE7350 WiFi range extender delivers the high speed internet and greater WiFi range for the numbers of WiFi devices. The installation process of the Linksys RE7350 WiFi range extender is straightforward. Let’s begin the AX1800 extender configuration process.
Visit Linksys Extender Web Page
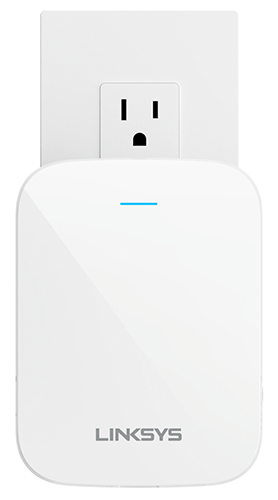
- Early, place RE7350 Linksys extender power plug in the working electrical socket.
- After that, power on the extender by pushing the power button.
- Now, take the WiFi gadget such as laptop or computer.
- Later, open the WiFi settings and join with the Linksys extender default WiFi network.
- Further, open the browser on a WiFi connected device and type extender.linksys.com in the URL bar.
- Fill in all the default credentials such as username and password.
Setup RE7350 Extender By WPS
Reminder:- Prior to doing the WPS setup method process, first check that your existing router supports the WPS button. In case your router is not supporting the WPS button then try another configuration method i.e., web browser setup based.
- Locate the RE7350 extender power plug in socket near to the main router.
- After that, look for the WPS button on both the extender and router unit.
- Press the existing router WPS button and later 2 minute push RE7350 extender WPS button.
- Now, the WPS connection is under process.
- Further, the WPS LED starts blinking solid which means the extender successfully joins with the router.
- After the completion of WPS method process, take out the extender power plug and locate it there where you are facing slow speed internet issues.
Configure By Web Browser Based
Follow the below steps to configure RE7350 Linksys WiFi range extender by web browser based method:-
- Plug in RE7350 range extender in socket.
- After that, connect your WiFi device with the Linksys extender default WiFi network.
- Enter the default IP address 192.168.1.1 in the browser URL bar.
- Later, follow all the display directions.
- Click on the start configuration option.
- Next, pick the mode on which one you want to use your Linksys RE7350 WiFi range extender.
- Pick that WiFi network you want to boost.
- For the main WiFi network insert the security key.
- In the end, click on the connect button option to finish the web browser based setup method.
Troubleshoot Configuration Issues
After the RE7350 extender configuration if you face any error such as still face slow speed internet issue.
Change Extender Location
The placement of the Linksys RE7350 extender don’t be closer to electronic units. Electronic units absorb the WiFi signals which come from the router and extender. So we recommend you to change the placement of the extender. Be sure that the placement of the Linksys WiFi range extender is closer to the main router.
Download Latest Extender Software
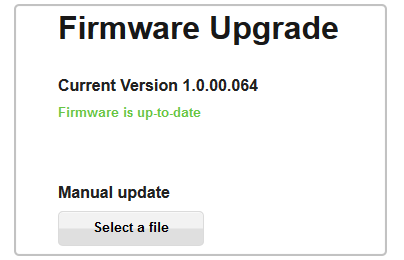
- To download software, prompts lower directions.
- Go to the Linksys extender web page by entering extender.linksys.com in the address bar.
- Fill in the login page details.
- After that, tap on network administration and then software installation option.
- If there is any latest version software file is pending then install it.
- The firmware downloading process takes 10 to 15 minutes to complete.
Identify Linksys Extender Settings
To identify the Linksys WiFi range extender settings you will require to open the web page on the web browser on any WiFi gadget. Make sure that WiFi unit must be linked with the Linksys extender default WiFi network. Now, one by one identify all the settings. If there is any change in setting then do it correct.
Reboot RE7350 Linksys
To reboot Linksys extender, push the power button to turn off. After that, take him out from the electrical socket. Now, rest and place him back into the socket. At the end, press the power button of the extender to turn it on back.
Reset All Default Settings
To reset all the previous default settings, follow below prompts:-
- First, grab a thin pin and insert it in the RE7350 extender reset hole button.
- Place the pin in the reset hole button for 10 seconds or until all LEDs are turned off.
- When the extender is reset, all the LEDs will be turned off.
After the entire directions of this post, we hope you can easily do the Linksys AX1800 RE7350 extender setup at home or office. If you face an error then you can also fix it by trying the apart solution tips. Contact to our Linksys tech expert if you have any doubts related to the Linksys device.