Linksys Velop AC1300 Setup - In Detail
Linksys Velop AC1300 device helps to boot up the range of the WiFi signals. The installation process of the Linksys Velop AC1300 WiFi range extender is so simple and unique. Within the next 30 to 45 minutes you can easily install the Linksys Velop AC1300 unit at your office or home. Now, let’s begin the installation process.
Things Required Prior To Do Velop Installation
- Get Whole Linksys Velop Package:- You can either buy a single node or pack of three. But you can’t connect more than three nodes with the Linksys Velop AC1300 mesh WiFi device. If you want more than three then you will require the network connection to have more than one.
- Ethernet Port:- You will require an available Ethernet port in all your router or modem.
- Gather WiFi Device:- Make sure that your WiFi device should not be linked with an existing WiFi network . You will also be required to power on Bluetooth on your WiFi device.
Steps To Install Linksys Velop
- Early take all the equipment that you require.If you have more than one router or node to configure then make sure to grab all the things in the same room as internet source or modem.
- Now, take out the existing WiFi router.
- After that connect your modem to the internet port of the Linksys Velop AC1300 node and power it on.
- Later, turn on all the Linksys Velop child nodes. You must make sure that no other wire connects to any other port on the child node during installation.
- Also, be sure that your cell phone is not connected to any existing WiFi network, then hit on install a new WiFi network.
- Hit on the Velop and mesh router.
- Switch on bluetooth if prompted. Consider all the display instructions and tap on the bluetooth icon to enable it.
- If you have already linked, then turn on the parent node to modem, tap on next and then click its connected.
- If you already turn on your child nodes then tap next. Uncertainty not on all child nodes then do it.
- Further, verify that all the Velop nodes have the solid purple light. Keep your WiFi device closer to the node while your node is in the installation process.
- Now, internet checking will start.
- Customize your WiFi network name and security password. The security password must be case sensitive. Once all the above processes are done, tap on next.
- When it is ready, click on continue.
- Wait a while for your network and child nodes to be configured.
- Once all the Velop nodes are configured, then the following screen will show the numbers of nodes that were successfully detected and configured on your WiFi network.
- Hence, your WiFi should now be ready. Click on go to dashboard.
Tips To Fix Velop Issue
After the Linksys Velop AC1300 setup, if you face any issue such as Velop blinks red light, still face slow internet speed, or other so many reasons then try the below Linksys Velop solution tips:-
Look Up An Internet Source
This problem might be with your isp, not in your Velop system. Your internet service provider is experiencing an outage or widespread issue.
Try To Upgrade Linksys Velop AC1300 Firmware
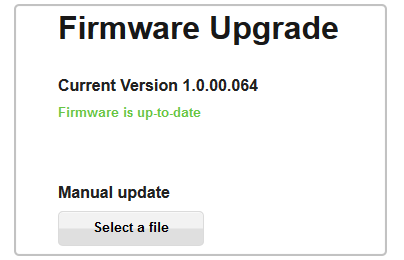
To upgrade the Linksys Velop AC1300 firmware, you will require to visit the Linksys Velop page or go to the Linksys Velop application. But make sure while doing this process, your WiFi device must be linked with Linksys AC1300 Velop default WiFi network. Further, look and click on the network administration option. After that, click on the software installation option. Now, if you see any software file is pending to install then install it. The installation process takes time up to 15 to 20 minutes to complete.
Power Cycle Velop AC1300
For this, push the power button of Linksys Velop AC1300 to turn it off. After that, from the socket take out the Velop AC1300 power plug. Further, within two minutes put the Velop AC1300 power plug back in the socket and press the power button to turn it on.
Reset All Previous Default Settings
To reset all the previous default settings, you will require to press the Velop reset button.
- For this, take a pin and insert it at a reset button.
- Only for just 10 to 15 seconds you will require the insert pin.
- All LEDs of the Linksys AC1300 Velop device will be turned off.
- All off LEDs define that your Velop is now completely reset.
Reminder:- You will require to configure the Velop AC1300 device again after reset.
If you want more updates on Linksys Velop device then stay closer to this article or reach out to contact our Linksys tech expert. Our tech experts are available 24×7 for you.