Linksys Velop AX4200 Setup - A comprehensive information
Linksys Velop AX4200 mesh WiFi device helps to boot range of WiFi signals. In a trouble free way you can configure Linksys AX4200 Velop mesh WiFi device. However, prior to doing the Linksys Velop configuration process make sure that you are familiar with the required basic information. Now, let’s go through the entire process.
Requirements For Linksys Velop Configuration
- Must have a working router with stable internet connection.
- Also sure that the power socket, switches are working properly.
- In any way, the ethernet cable is not damaged.
- Must have the latest android or IOS device in hand.
- Linksys smart application must be installed on your device.
AX4200 Setup By Linksys Application
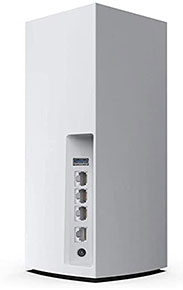
- Early, place the Linksys Velop device closer to the existing router.
- After that, put ethernet cable one end into the Linksys Velop ethernet port and another end of cable in the router ethernet port.
- Now, by inserting the power wire, attach it with the power plug.
- Once it is linked with an electrical socket, the indicator LEDs turn into blue which indicates that everything is now set to proceed further.
- Further download and open the Linksys WiFi application on your WiFi gadget.
- Accept all the terms and conditions, make an email account and create a password.
- Now, a pop up comes up on your display and it asks you where the internet comes from.
- Later, from there pick up your internet connection and launch WiFi list on the Linksys application.
- A Linksys Velop setup network name now shown up in the list.
- Click on that, and fill in the password. You can get the Velop password at the bottom of the node.
AX4200 Linksys Velop Setup Through Web Portal
Apart from the Linksys AX4200 Velop setup application method, you can also do the configuration process through a web portal. But just keep in mind that your node is in the factory default settings.
Directions To Configure Parent Node
- Early, go to the web browser and type myrouter.local in the URL bar.
- By doing the first step, the browser will directly bring you to the linksyssmartwifi.com blocking html page.
- Now, remove blocking html and type setup html in the URL bar.
- By doing that, a sign in page will appear on the screen.
- Fill in ‘admin’ for both username & password and hit on sign in.
- On the other page, make your WiFi network name and password. Hit on the Linksys Velop AX4200 setup node option.
- Once the part process is done, just click on the I am done adding nodes.
The parent node setup process is done now. In the next step you will need to set up an internet connection. Consider the lower steps to do this:-
- Again open the web browser and type myrouter.local in the address bar.
- Fill in the details and then click on the CA option at the last corner.
- By visiting on that dashboard, just go to the internet settings and configure this process by picking the internet connection type.
- By making the internet connection successful, the parent’s node LED light turns into solid blue.
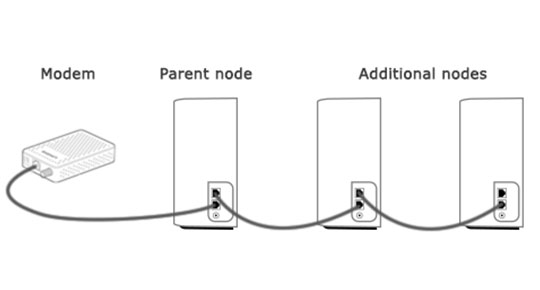
- In the setup to add a child node, place the child node closer to the parent node.
- Join the parent and child node by an ethernet cable and just go to the wired node option.
- After adding the child nodes click on the ok button.
Troubleshoot Linksys Velop AX4200 Setup Issues
‘If you find any issue while using the Linksys Velop AX4200 setup then consider the below solution tips to fix that.
- Verify the router is working properly and must have an internet connection.
- Analyze the Linksys Velop node LED indicator which is at the top.
- Perform the ethernet wire connection again.
- Download the latest version software.
- Reset all the previous default settings by pushing the reset button for 10 seconds by paper clip.