Linksys Velop Pro 7 Setup - A comprehensive information
Linksys Velop pro 7 is a mesh WiFi unit. This Linksys device provides high speed internet in all zones of the house or office. The installation process of the Linksys Velop pro 7 device is so simple and unique.
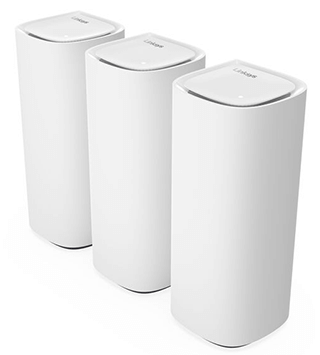
Overview Of Product
Top View
- The light at the node top, provides the information about the node’s operation.
- Blinking blue LEDs defines that the node is starting up.
- Solid blue LEDs indicate that the Linksys Velop node is working well.
- Blinking purple LED light defines that the Velop node is paired with a phone for configuration.
- Stable purple LED means that the node is now ready for installation.
- Blink red LED means that the node has lost the connection to the primary node.
- Solid red defines that the Linksys Velop node has lost the connection from the internet.
Bottom View
- Reset Button:- At the bottom of the unit you can see the reset button.
- Power Switch:- Push the power button to turn on the Linksys Velop pro 7 device.
At Side View
- Ethernet Port:- Connect and ethernet cable to this gigabit ethernet port and also to the other wired devices.
Setup Linksys Velop By An Ethernet Cable
The below are the few steps by which you can quickly do Linksys Velop pro 7 device quickly.
- First of all, configure the parent node by using the Linksys Velop application.
- After that, join an ethernet wire to the child node and then join the other end of the wire with the parent node.
- Now, you can easily connect from the WAN or LAN port of the child node with the parent node LAN port.
- Later, the node will automatically switch to a wired connection and the Velop node light starts blinking purple.
- Once, the light of the child node turns into solid blue, tap done on adding child nodes.
Configure Velop By WPS
Important note:- The device that you want to connect with Velop, that device must support the WPS button.
- First download the Linksys WiFi application from the app store or google play store.
- After that, open the app and fill in the details.
- Now, tap on the connect device with the WPS option button.
- Further, click on the WPS switch to power it on and then connect.
- It may take it up to 2 minutes to complete the WPS pairing process.
- Later, push the WPS button of that device which one you wants to connect with Velop.
- Once the unit name will appear in the device section of the Linksys application. If not, then click on the refresh icon if needed.
Tip To Fix Linksys Velop Issue
Check Cable Connection
The Linksys Velop requires it to be linked with the modem by using a compatible cable with the working internet connection. If this issue is not fixed the Linksys Velop internet connection problem will continue to exist. You must make sure there is not any loose connection and the wire must plug in perfectly.
Take Out Barriers
The WiFi signals of Linksys Velop occasionally get weaker owing to the WiFi interference. Hence, the WiFi interference is caused by anything that reflects the radio frequencies such as barriers, reflections, or some other equipment.
Update The Firmware
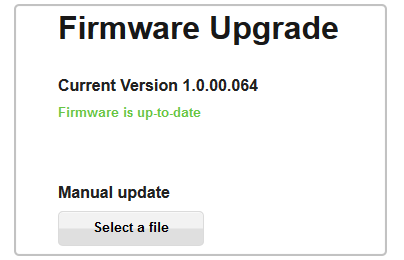
To update the firmware of the Linksys Velop 7 pro mesh WiFi device you will require access to the Linksys web management page. Follow the below steps to access Linksys web page:-
- Early, install the Linksys application on your WiFi device.
- After that, open it and click on the menu icon on the upper left side of the screen corner.
- Later, select the network administration option.
- If the latest software file is pending, then install it.
- The installation process will take 10 to 15 minutes to complete.
Identify Power Supply
The Linksys Velop device requires an efficient source of power. The Velop device can’t perform well without a proper power supply. For that reason, you will require to plug in the Linksys Velop unit into the preferred power socket.
Reset All Linksys Velop Default Settings
- Early, take a pin in your hand.
- After that, look for the reset button.
- Now, insert a pin in the reset button for 10 seconds.
- Later, all the Linksys Velop LEDs will be turned off.