Linksys Velop WHW0303 Setup

Live Chat

Struggling with a technical issue? Write to us right away. Our support team often responds quickly.

OR

Don’t want to wait? Call us right away.

    Introduction to Linksys Velop WHW0303 Setup

    In case you are struggling with internet connectivity issues, Linksys Velop WHW0303 will prove to be a game changer. It is a top tier mesh wifi network system. This system offers seamless connectivity throughout the area. To begin with, the system has tri-band mesh technology. The technology ensures efficient handling of multiple devices. Consequently, you can enjoy uninterrupted internet access.

    Furthermore, the Linksys Velop WHW0303 Setup is remarkably straightforward. You can easily configure the device by using the Linksys app. Moreover, you can manage settings, change network password and much more by using the app. We are going to furnish a detailed guide about Linksys Velop WHW0303 Setup and other important information in this page.

    Linksys Velop WHW0303 Setup

    Linksys Velop WHW0303 Specifications

    Earlier than Linksys Velop WHW0303 setup you need to understand the whole system. The features & specifications of the device will help you understand it better. This will help you in grabbing better from your mesh wifi system. The device is featured with a 716 MHz Quad Core processor, two WAN/LAN auto-sensing Gigabit Ethernet ports and six internal antennas with high powered amplifiers. Moreover, the device is equipped with WPA2 personal security features. Thus, you can ensure a safe and customized online experience.

    Linksys Velop WHW0303 Unboxing

    Now you must desire to know what you will get while unboxing Linksys Velop WHW0303. Here is the list of items you will get in the box:
    • Three Linksys Velop Nodes
    • One Ethernet cable
    • One Ethernet cable
    • Three Power adapters
    • Quick Start Guide
    • Printed Documentation

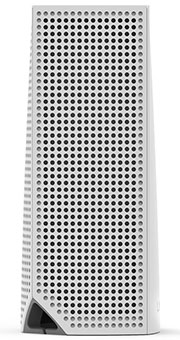
    Linksys Velop WHW0303 is a whole home mesh wifi system that includes 3 velop nodes. This system is to offer you seamless connectivity throughout your home. Let’s continue with the Linksys Velop WHW0303 setup process.

    Linksys Velop WHW0303 Setup Procedure

    Linksys Velop WHW0303 setup is a user-friendly process. You need to follow the below given step by step instructions to complete the configuration without hassel. So let’s start:

    Positioning of the Nodes

    First step in the process of configuration is the position decision of the nodes. You need to place primary node closer to the modem. As the configuration of primary node will be done by using Ethernet cable. Rest both the nodes can be placed where you need strong network coverage.

    Power the Nodes

    After positioning the nodes, you need to plug-in the adapters in the primary node first. To power up the node, you need a power socket. Before powering up the other two nodes you need to complete the configuration of the primary node.

    Download the App

    Next step in the process is to download the Linksys app. You need a mobile or tablet in which you can use the Linksys app. App is available on google play store for android users whereas on app store for IOS device users. You can visit the store & search for the app. Once the app is installed you can move ahead for configuration.

    Create Linksys Account

    After installation of the app, you need to create an account. To begin with the account creation, you need to open the Linksys app. Thereafter you need to follow the app screen guide for account creation. Provide the name, email account & create password. You need to verify your email for completion of the process.

    Set up a Network

    Prior to proceed with this step you need to connect the modem with the primary node by using Ethernet cable. Thereafter go to the app home and select “set up a new network” option. Follow the in app instructions to complete the configuration. You need to create a username & password for your network. Remember to create a memorable but strong password. Wait for the LED on the node to turn solid blue.

    Additional Nodes Setup

    Once the configuration for the primary node is done, plug-in the second node to the power outlet. The LED on the node will show blinking blue. Wait and continuously watch the light. When it’s blinking purple, it means the node is connecting with the device. When it turns solid purple, it means it is ready for setup. Let the setup process complete and then repeat the steps with the third node. After the setup of the third node is done, press finish option.

    Hence your Linksys Velop WHW0303 setup is complete. Now you can move the additional nodes as per your choice if needed for better coverage. Remember you need to place additional nodes a bit closer for the setup process.

    In the end, the setup steps mentioned above are very simple and defined briefly. You can follow these steps as mentioned to ensure the smooth installation of a mesh Wi-Fi system. With this system setup you can use the internet without a buffer or lag throughout the area.