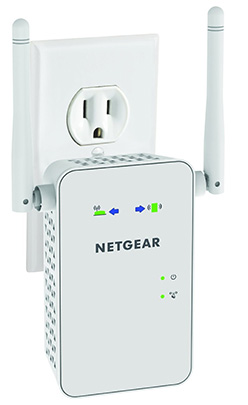
EX6100 Netgear Extender Installation
Grab Few Things To Do Setup
- A computer or laptop.
- Take an ethernet cable.
- Have an active internet connection.
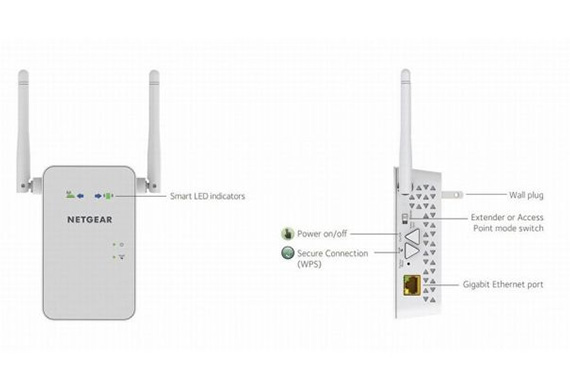
LEDs Light Verification
- If the light is solid green then it means there is a wonderful connection.
- If the light is solid amber then it defines a good connection.
- In the poor connection, the red light starts flashing.
- If the client LED is solid green then there is the best connection.
- When there is a good connection, a solid amber LED starts flashing.
- Solid red LED defines there is a poor connection.
Access EX6100 Extender Login Page
Press EX6100 Extender WPS
To do the setup of an extender, press the WPS button. For this method also make sure that your host router supports the WPS button.
First, in the electrical socket near the existing router place the extender power plug. After that, look for the WPS button on the router and extender units. Now, press the WPS button to connect the extender to the router. Further connecting, remove the extender power plug from the socket and place it there, where you face slow-speed internet.
If you cannot do the Netgear EX6100 setup through the WPS method for some reason then don’t worry try another method to install the EX6100 Netgear extender.
Setup Through An AP Mode
Plug in your Netgear EX6100 extender in an electrical power socket. After that, push the extender power button, if the power LED not blinking. Next, connect the cell phone or computer with the EX6100 extender default network. Further, on a connected device open the browser and type mywifiext.net in the search engine bar. The Netgear extender configuration page opens on your display and click on the Netgear extender setup option. Select your Netgear EX6100 extender credentials. Thereafter, select and answer the two security questions. Ultimately, save all the changes to complete the Netgear EX6100 extender setup process by this Access point mode.
Further doing the login and configuration process of the EX6100 Netgear extender, if you face a slow speed internet problem or any other issue then try the lower solution tips to fix the extender error.
Resolve EX6100 Netgear Extender Errors
Place EX6100 Extender At Optimal Location:- By placing the extender at the optimal location of your entire house or office you can easily fix an error. Make sure that extender metal or electronic appliances not be placed when you change the extender placement.
Update EX6100 Extender Software:- To upgrade the EX6100 extender software, you need to visit the web management page. By visiting that page, tap on the network administration option and then click on the software installation option. If you see any latest software version files, install it on your computer or laptop. The installation process will take 5 to 10 minutes to complete.
Reboot Netgear Extender:- To reboot the Netgear extender, press the power button to turn off the device. After that, from the socket take out the EX6100 extender power plug. Now, wait and place the back extender plug in the socket. In the end, press the EX6100 extender power button to power it on.
Reset Netgear Extender:- To reset the Netgear extender, take a hairpin or paper clip. After that, enter that pin in the reset button of an extender. Now, all LEDs of the EX6100 Netgear extender will turn off. All Netgear extender LEDs will turned off which means your extender is completely reset.
After resetting the EX6100 Netgear extender you will required to do the login and setup process again.
Further, with the entire information on this page, you will be able to perform the login and setup process manually without taking any help from the technician.