Reyee E6 Router Setup In-Depth Details
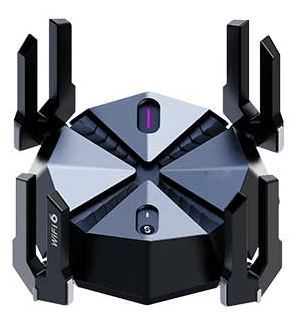
The Reyee E6 AX6000 Wi-Fi Router is the prime choice for many people, especially for gaming. It is a dual band router with eight high performing antennas & high power FEMs. Furthermore, beamforming technology is also used in this device. This ensures a stable & strong WiFi connection. This device directs the WiFi signals to the connected devices instead of broadcasting them randomly. With the Reyee E6 Router Setup, you’ll get high speed internet experience without lag. You can connect multiple devices simultaneously.
The Reyee E6 setup is user friendly. You can do the setup even if you are not tech savvy by just following a few instructions. Step by step guide for the Reyee E6 Router Setup has been mentioned further on this page.

Reyee E6 Router Unboxing
Reyee Router E6 unboxing reveals a sleek design device with eight high performing antennas. Inside the box with the device you may also get Power Adapter, Ethernet Cable, installation guide and warranty card. Take out all the things with utmost care.
Reyee E6 Router Setup Instructions- As Primary Router
Power Up The Router Device
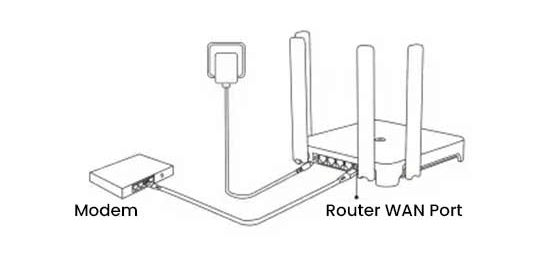
- First of all you need to connect the power adapter of the router in the power port.
- Connect the power adapter plug with the power outlet.
- Then switch on the power supply and check the E6 router’s power LED.
Connect The Router With Modem
- Connect the LAN port of the modem with the WAN port of the router.
- You can use ethernet cable to establish the connection.
Verify The Internet Connection Type
- Next you need to connect your ISP and verify the internet connection type
- If your connection is PPPoE mode, then you need a username, a password, and possibly a service name
- In case your connection is static IP address mode then you need an IP address, a subnet mask, a gateway, and a DNS server for configuration
Connect To Router
- Connect a smartphone/ laptop to your router.
- For connection you need to go to the WiFi settings and look for Reyee-sXXXX network
- Enter the default details (can be found on the bottom label of the router.) and connect to the device.
Access Setup Page
- Go to the web browser and search for “192.168.110.1” default IP of the device.
- Enter the required details on the screen and access the login page
- Select configure and follow the on screen instructions.
- Select your network type and provide the information as needed.
- Click on next option and configure your device settings
- Complete the steps as displayed on the screen to complete the configuration.
Reyee E6 Router Setup Instructions- As Secondary Router
Prior to starting the Reyee E6 Router setup as secondary router, must verify that the primary router setup has been completed successfully. The internet connection through the primary router must have good access.
Power Up The Router Device
- First of all you need to connect the power adapter of the router in the power port.
- Thereafter connect the power adapter plug with the power outlet.
- At last switch on the power supply and check the E6 router’s power LED.
Connect The Router With Primary Router
With Ethernet Cable
- Connect one end of the ethernet cable in the new router device WAN port.
- Connect the other end in the LAN port of the primary router.
Without Ethernet Cable
- Place the secondary router closer to the primary router within 2 meters
- Let the device connect wirelessly with the primary router.
Configure Your Secondary Router

Wired connection setup
- Once wired connection has been set up between the two routers, wait till SYS LED on the secondary router to be steady.
- Now press the Reyee Mesh button on the primary router.
- Let the device configuration be complete.
- During the process, the default SSID and password of the secondary router will automatically be synchronized to be the same as those on the primary router.
Wireless Connection Setup
- Wireless Connection By Web Configuration
- Go to the web browser and search for “192.168.110.1” default IP of the device.
- Thereafter, enter the required details on the screen and access the login page
- Select the configure option and then follow the on screen instructions.
- Select the “Wireless Repeater” option and then provide the information of your primary router WiFi SSID & password.
- Click on the next option and follow the screen.
- Lastly, complete the steps as displayed to complete the configuration.
- Wireless Connection by using the Reyee Mesh function
- After placing and switching on the power, you need to press the Reyee Mesh button on the primary router.
- Wait for about 2 minutes and let the configuration complete.
- During the process, the default SSID and password of the secondary router will automatically be synchronized to be the same as those on the primary router.
- Thereafter you can relocate the secondary router where the Wi-Fi signal needs to be extended.