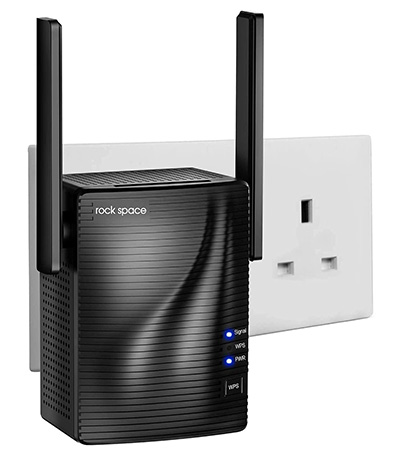
Rockspace AC1200 Extender Setup- Hassle-Free Installation Tips
Is your home wifi connection struggling to reach all corners of your house or office space? Don’t worry! You are not alone, we will help you get rid of this. The Rockspace AC1200 extender is the best answer to your question. There are several factors that weaken your wifi signals, like thick walls, furniture, and so many other things. But every problem comes with a solution. Rockspace has developed great devices that are used to extend the reach of wifi signals. The only requirement to enjoy the benefits is to set up these devices carefully.
To know more about Rockspace AC1200 extender setup and its features, continue reading this page.
Growing Need of Rockspace Extenders
The problem of weak signals is a common issue nowadays. Physical obstructions and interference from other electronic devices contribute to signal degradation. But Rockspace extenders eliminate this problem and provide consistent connectivity throughout your space. Moreover, the standout features make them the first choice among internet users.
- Dual-band technology
- Easy setup
- Universal compatibility
- Compact design
Role of User Manual in Rockspace AC1200 Extender Setup
Before performing the setup process, it is recommended to go through the user manual. There you can find detailed Rockspace extender setup instructions. The user manual also contains default login credentials along with the IP address of the extender.Therefore, after unboxing the extender do these things first and move on to the next steps. However, if you face any difficulty in understanding the terms given in the guide, get in touch with our experts.
Easy and Convenient Method- WPS Process
The most convenient and hassle-free method for setting up the extender is by using the WPS button. This method hardly takes 10 minutes to complete the process. What you need to do is press the WPS button of the extender and within the next two minutes press the WPS button of the router. Now, follow the below given steps and accomplish the Rockspace AC1200 extender setup effortlessly:
- First thing first, make your extender ready for the setup
- Plug it to the power outlet using the adapter near the router
- Now press the WPS button as directed above
- Make sure you have properly pressed the WPS button on both devices
- The LED status on both the extender and the router will tell the status of process completion.
- Now, place the extender at the proper location where you face slow internet speed.
Other Approaches for the Rockspace Extender Setup
First Approach- Using Web Interface
In any case, if your extender does not support the WPS method, you can follow this approach. In this, the setup is done using the web interface:
- Use your mobile device or computer to connect to the extender’s wifi network. Open the browser and you will be automatically directed to the setup interface.
- The setup wizard will guide you through the process of configuring your extender. Simply follow the instructions given in the setup wizard. Here you will be asked to enter the network name and password. Do as instructed and move forward.
- You can also change your network name and password if desired for security concerns.
- After setup, place the extender at the desired location. It is advisable to move it closer to the with weak signals to improve coverage and performance.
Second Approach- Using Rockspace Application
You can also use the Rockspace app to complete the setup process. Follow the steps given below:
- Open the AppStore in iOS or Play Store in Android to download the application.
- Now search for Rockspace wifi app.
- Choose the latest and official version of the application so that you will not face problems later.
- The next step is to agree to terms and conditions of the app and you will be directed to the login window.
- Enter the login credentials correctly and press enter.
- Finally, the Rockspace extender setup page will appear on the screen. Follow the instructions provided and the setup is done.
What to do if Login Errors Occur?
It is common to face issues during the login process. Although reasons are so many that prevent you from login, the solutions are also there. Here are some tips that you can try to solve the login errors:
Establish Connection Again
The main cause can be the weak connection between the extender and the other devices. This problem arises when the device is not properly connected to the official network or you have used the broken ethernet cable. Therefore, check these first and connect again.
Cross-Check Login Credentials
While filling in login credentials make sure to check them twice. Because spelling errors in the login details prevent you from logging in to the interface. Therefore, keep this thing in mind you have done everything right.
So, these were a few instructions that make your Rockspace AC1200 extender setup process smooth. For any query, you can contact us at +1 716-992-6371.