Rockspace Outdoor Extender PE1 Setup Complete Guide
Is a slow internet connection impacting your productivity? In this 5G era, nobody expects slow or poor connectivity. Whether you are a business owner or an individual, you always want to stay connected. But weak wifi signals ruin this and end in buffering and no internet. But fret not! Roackspace has developed devices that not only improve your internet experience but also save your time and energy.
Rockspace extenders are the universal solution for weak wifi signals. These extenders provide impeccable connectivity throughout your space. The only required thing is to do the Rockspace outdoor extender PE1 setup correctly. Let’s discuss more about this unique extender.
Rockspace Outdoor Extender PE1- Overview
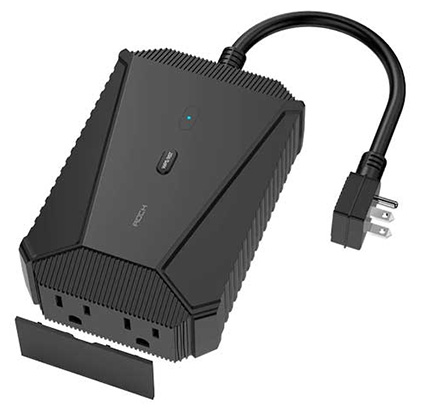
The Rockspace outdoor extender PE1 is a useful device which has a built-in smart plug. Whether you are looking to enhance your wifi signals in the backyard, garden, or other outdoor area, this extender is designed to meet all your needs.This device has advanced features that make it perfect fit for the outside environment. Therefore, if you want to use it in the best way, complete the Rockspace outdoor extender PE1 setup accurately.
With its waterproof design and durability, this extender is useful in any weather. So, this is an ideal device for internet connection outdoors.
Let’s Begin the Setup Process- Step by Step
Preparing for Setup
- The very first thing is to choose all the necessary things that are required during the setup procedure.
- Choose the best location to place the extender. Typically, the central location in the space is considered to be the best. The reason is that it extends wifi signals in all directions from this place.
- Secondly, always place the extender near the router for the best performance. The extender should be placed halfway between the router and the areas with weak signals.
Rockspace Outdoor Extender PE1 Setup Instructions
- Plug the Extender PE1 into a power outlet near your chosen installation location.
- Wait for the power LED indicator on the extender to blink, indicating that it’s receiving power.
- On your computer or mobile device, navigate to the list of available Wi-Fi networks.
- Locate the network name (SSID) for the Rockspace extender, which is typically labeled as “Rockspace_PE1” or similar.
- Select the Rockspace extender network and enter the default password if prompted (usually provided in the user manual).
- Open a web browser on your device and enter the default IP address of the extender into the address bar.
- Press Enter to access the setup interface of the Rockspace Outdoor Extender PE1.
- Follow the on-screen prompts to log in to the extender’s setup interface using the default username and password.
- Once logged in, you’ll be guided through the setup wizard to configure basic network settings.
- Enter your existing Wi-Fi network’s SSID and password to allow the extender to connect to your router.
- Depending on your preferences and network requirements, you may have the option to customize advanced settings such as Wi-Fi channel selection, security settings, and guest network configurations.
- Take your time to review and adjust these settings according to your needs.
- After configuring all the necessary settings, review your selections one last time to ensure accuracy.
- Click on the “Apply” or “Save” button to save your changes and finalize the setup process.
- Wait for the extender to reboot, which may take a few moments.
- Once the extender has rebooted, reconnect your device to your home Wi-Fi network.
- Test the connectivity by moving to different areas within your outdoor space to ensure that the extender provides adequate coverage.
Support Team
Improve your Outdoor Internet Experience Like Never Before!
You’ve successfully completed your Rockspace Outdoor Extender PE1 setup. With your network coverage extended outdoors, you can now enjoy seamless connectivity in every corner of your outdoor space. We hope this guide is helpful in simplifying the setup process and maximizing the performance of your extender.
So, no more buffering, enjoy only uninterrupted streaming, gaming, and browsing while sitting in the garden or backyard of your house. Moreover, the frustrating dead zones have also been removed from your space. If you have any questions, don’t hesitate to reach out to us.