TP-Link Extender Setup: Detailed Guide With Troubleshoot
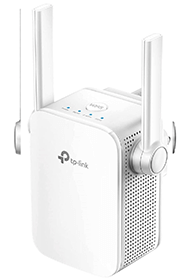
TP Link, a trusted brand by several people across the globe offers several hardware devices. TP-Link Extender is one of those. TP-Link Extender Setup can enhance your existing network signals. The device will receive signals from your existing router and then transmit it to eliminate dead zone areas. With the setup of the device, you no longer face weak signals or no signals across your home or office. By following our guide, you can transform your home or office into a WiFi heaven. Further section of this page includes a step by step guide to setup your TP-Link extender in your existing home or office network. In addition, you can also get troubleshooting tips to resolve common issues with the TP-Link Extender device.

TP-Link Extender Setup Process
TP-Link Extender Setup may involve below given easy steps. You can follow any of the methods mentioned below to configure your device. All the three methods are simple and easy to follow. With our step by step guide you can easily do the setup.
Setup Via WPS
Setting your TP-Link extender device using the WPS button is a quick and easy method as compared to other methods. This method involves only three steps. Moreover, it takes only 5 to 10 minutes to complete the process. So let’s check out the process:
Unbox, place and Power the Extender
- First of all you need to unbox the device and look for a proper placement.
- Thereafter you need to connect the extender device with the power adapter and plug-in it in a power outlet.
Locate WPS Button
- Next, you need to locate the WPS button on both router and extender device.
Configure Your Device
- Press the WPS on the router device following which press the WPS on the extender device within 2 minutes.
- Look for the device wireless signal LED to confirm the process is complete.
- In case the wireless signal LED of your Range Extender is not lightened up then try it again. It shows the configuration fails.
Setup Via Web GUI
Unbox, place and Power the Extender
- First of all you need to unbox the device and look for a proper placement.
- Thereafter you need to connect the extender device with the power adapter and plug-in it in a power outlet.
Access Setup Page
- Open the web browser of your choice (such as Internet Explorer, Google chrome) in a computer/ laptop
- Thereafter go to the address bar and search for “http://tplinkrepeater.net” or “http://192.168.0.254”
- Login page will pop up, here you need to type admin in both the places as username and password
Configure Your Extender
- Go to the quick setup and click the next option
- Then select your region and again press next
- Now select your network from the list of all available networks
- Click on the next option and provide your network password.
- Click on the next option, customize your new network settings and click on the finish button.
Setup Via App
Download the TP-Link Tether
- Go to the app store or google play store and search for the “TP-Link Tether” app
- Click on install option and let the app install on your device.
Create TP-Link ID
- Go to create TP-Link ID option and further screen will open.
- Mention the details as asked including user ID & password.
- Click on the sign-up option and your account has been created.
Add a New Device
- As your account has been created successfully, you have to click on “+” sign from the dashboard
- List of devices open, choose “range extender” and then click on Add option
Unbox, place and Power the Extender
- Nowl you need to unbox the device and look for a proper placement next to the router.
- Thereafter you need to connect the extender device with the power adapter and plug-in it in a power outlet.
Grant Location Permission & Connect to the Network
- Now you need to grant the location permission so that the app can access the nearby available networks.
- Select your network and click on connect option within the app.
Create Extender’s Password
- Create a password for your new network
- Follow the on screen instruction to complete the TP-Link Extender Setup
Apply Changes
- After that click on the Apply option and the changes you have made will be saved.
- Hence, your network setup process completes.
TP-Link Extender Troubleshoot Tips

Troubleshooting the issues with the extender may involve following tips:
- First check your internet connection with the router.
- Thereafter check all the cables connected with the devices.
- Now reboot your device to resolve the connectivity issue.
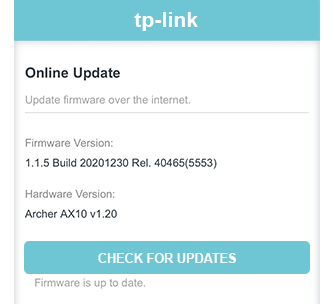
- Check for the firmware updates. In case any pending update found then you need to run update first to resolve the problem
- Lastly, try resetting your device to its factory settings and re-configure it.