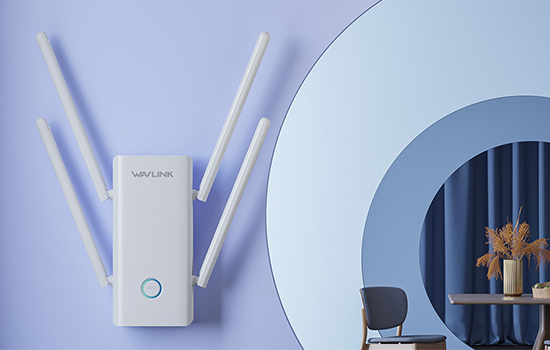
Effortless Wavlink AX1800 Extender Login And Installation
Go To AX1800 Extender Login Page
First, into an electrical socket place the Wavlink AX1800 extender power plug. After that, power it on by pressing the power button. Later, grab the computer and connect it to the Wavlink AX1800 extender network, Now, launch Chrome and type the default weh address wifi.wavlink.com in the address bar. Fill in the entire information such as the default password and SSID. In case you don’t know the default login details then look up the device tag. At the end, tap on the login button to complete the Wavlink AX1800 WiFi range extender login process.
Can’t Access AX1800 Web Page
- Identify that the computer is perfectly attached to the Wavlink AX1800 extender default network.
- Fill in the correct login details.
- Place the extender power plug in a power-supplied socket.
Via Punching the WPS Button Do The Configuration
Note:- Make sure while doing the WPS method, your existing router also supports the WPS button.
Early, near to the router place the extender plug-in socket. After that, power on the extender. Now, look for the WPS button on both extender and router. Next, press the WPS button of both units to connect the extender to the router. After connection, take out the extender power plug from the wall socket and locate the extender in that area where you want high internet speed.
Setup Extender By AP Mode
If your extender does not support the WPS button, then try this AP mode method to configure the Wavlink AX1800 extender. To do this AP mode method process, follow the below directions.
First, in an electrical socket place the extender power plug. After that, connect an ethernet cable to the AX1800 extender ethernet port. Later, connect another end of the cable to the computer’s ethernet port. Now, connect the computer with the Wavlin-n default network. Launch the browser and fill in the default web portal, By doing apart steps you can successfully visit the Wavlink AX1800 extender configuration page. In the end, by considering the apart instructions, configure the extender to your current wireless network.
After doing the Wavlink AX1800 setup process if you face an error such as the gadget does not work properly or facing slow internet speed then try the below solution tips to fix the error.
Tips To Fix AX1800 Extender Error
To fix the Wavlink AX1800 extender error, follow the below directions.
- Identify All Wireless Settings:- You will be required to match the extender settings with the router. If you fail to perform the right settings then the Wavlink AX1800 extender will not be able to connect with the WiFi router.
- Locate The Extender Closer To The Router:- Placing the Wavlink AX1800 WiFi range extender near the router. We recommend you place the extender and router at the central location of your house. But make sure that, closer to the router and extender do not place metal or electronic appliances because they absorb all the WiFi signals.
- Download Wavlink AX1800 Extender Software:- To download the extender software, go to the Wavlink web management page. For this, on a computer open Chrome and hit wifi.wavlink.com in the address bar. After that, search for the network and then tap on software installation. If you see any latest software file then install it on your computer and laptop.
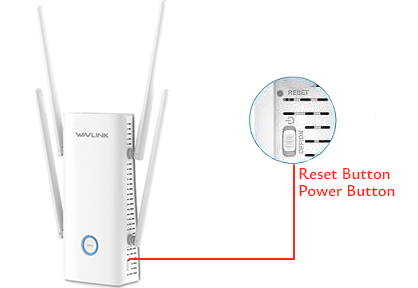
- Reset All Default Settings:- Grab a hairpin. After that, look for the reset button on the Wavlink AX1800 extender. Further, in the AX1800 extender reset button insert the pin. Now, all LEDs of the Wavlink AX1800 extender will be turned off. All power-off LEDs indicate that the extender is reset now.
- Important Note:- After doing the reset you will need to do the login and setup process of the Wavlink AX1800 WiFi range extender.
After the entire directions on this page, you will be able to know all the information about the Wavlink AX1800 WiFi range extender. If you are interested in getting more information then directly contact our tech expert.