Wavlink Extender Setup

Live Chat

Struggling with a technical issue? Write to us right away. Our support team often responds quickly.

OR

Don’t want to wait? Call us right away.

    Wavlink Extender Setup Secrets Revealed

    Welcome to our guide where we reveal some of the secrets of the Wavlink extender setup. If you need help with dead zones and weak wifi signals in your home or office, this is the right place for you. In this guide, you will discover the powerful devices behind your wifi enhancement. Let’s not waste time and discuss the secrets to optimizing wifi connection using a Wavlink extender.
    Wavlink Extender Setup

    Stay Connected with Wavlink Extenders

    Never Settle for Less, Experience Only the Best Connectivity with Range Extenders

    Wavlink extenders are powerful and useful tools for improving your wifi coverage and performance. Basically, these are the devices that are placed between the router and the areas with weak wifi signals. With advanced features and great functionalities, Wavlink extenders enhance your wifi experience. In addition to that, these extenders possess dual-band capability that allows them to provide better coverage over longer distances and faster speed.

    Wavlink extenders not only fight with dead zones but also provide consistent connection throughout your space forever. Moreover, with the user-friendly setup, you can easily perform the Wavlink extender setup procedure and run your extenders within minutes without technical assistance.

    Check out How Extenders Work

    The range extenders receive wifi signals from the router, and then retransmit them and in this way effectively expand the coverage area of your network. Therefore, it is better to place the extender strategically such as near the router so that it can receive signals easily. The extender then amplifies these signals and provides a stronger and more reliable connection in areas where signals are normally weak.

    Get Better Connectivity with the Correct Wavlink Extender Setup

    If you want to use your range extender like a pro, follow the setup instructions given below and get seamless connectivity.
    • Plug your extender into the power outlet using a power adapter. Watch the LED status, if it blinks it means the extender is receiving the power properly.
    • The next step is to connect your device with the extender wifi network. Now open the browser and use the extender’s IP address to open the login page.
    • Here you need to fill in the credentials. If you are setting up your for the first time, you can use default credentials, you can change them later for security purposes.
    • The extender setup page will be displayed on the screen. Now, click on New Extender Setup and agree to terms and conditions.
    • After that, follow the required instructions and complete your Wavlink extender setup process.

    Do Linksys Extender Installation By An Ethernet Cable:-

    After doing the login and setup process of the Linksys extender if your extender does not work properly, then don’t worry, try the below troubleshooting tips to fix an error.

    Some Advanced Configuration Techniques

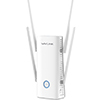
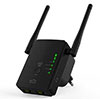
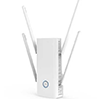
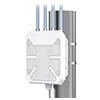
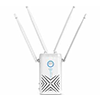
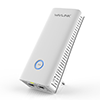
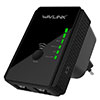
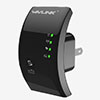
    You have seen the basic Wavlink extender setup procedure. However, to get the elevated experience you have to do some advanced settings. These advanced features allow you to customize your extender’s settings for maximum performance, seamless connectivity, and optimized network efficiency.

    Channel Selection

    Channel settings are one of the key aspects of optimizing your wifi network. Most internet users know that wifi operates on two different channels within the 2.4 GHz and 5 GHz frequency bands. By selecting the least congested channel, you can minimize interference and enjoy improved signal quality. Therefore, when you opt for Wavlink extenders you can manually select the optimal channels for your environment.

    Signal Strength Adjustments

    Slight adjustments in the signal strength of your range extender help to improve the coverage and performance of the wifi network. So, by following advanced configuration settings, you can control the transmission power of the extender so that your extender extends the coverage to the area where it is most needed. Moreover, with this approach, you can eliminate dead zones and ensure consistent connectivity throughout your space.

    Band Steering

    With this technique, your devices are connected to the best wifi frequency in your space. Generally, all extenders come with two frequency bands 2.4 GHz and 5 GHz. But thanks to Wavlink extenders, where you do not need to manually choose between the two, you just have to enable the band steering feature. This can reduce the congestion on your wifi network and provide faster speed.

    Quality of Service Settings

    QoS setting basically prioritizes network traffic on the basis of some specific criteria like application type or device priority. In Wavlink extenders you can adjust your QoS settings to make sure that bandwidth-intensive applications get priority access to the network resources. Because of this, internet users experience uninterrupted access even during heavy network usage periods.

    Guest Network Configuration

    This is the best feature that most of the range extenders provide- the guest network configuration. By setting up a separate guest network you can keep your primary network secure while providing the visitors with access to the internet. You can also customize the guest network settings like SSID and password to prevent your main network from unauthorized access.

    Contact Our Support Team for Expert Assistance

    If you have any questions regarding the setup and optimization of your Wavlink extender, don’t hesitate to take the help of our dedicated support team. So, grab your phone, find the contact details below, and call us for personalized and professional assistance.