Destination: Connectivity! Your Complete Netgear Extender Setup Handbook
Extenders are used to maximize the coverage of your existing router. No matter how powerful and advanced your main router is, it leaves a few dead wifi zones unattended. But Netgear extenders are there to eliminate that issue. Extenders are highly advanced network devices. They receive internet supply from the main device. Then, amplify its quality and coverage. Lastly, the extenders supply the best quality internet to all the connected devices. Therefore, it is needless to say that extenders are revolutionary devices that are designed to improve the quality of the internet. But the quality depends on how accurately you have set up your extender. Most people face issues when it comes to performing the Netgear extender setup. But you do not have to worry anymore. Because we are going to explain every single detail related to the Netgear extender setup.

About Netgear Extender
- Play and plug extender with scalable features.
- Advanced and modern device exterior with coverage of up to 2500 sq. ft. area.
- Seamless Smart Roaming.
- Dual-band wifi technology with a speed of 6 Gbps.
- Universal compatibility.
- LED lights, WPS feature.
- Wired ethernet ports.
Things To Know Before Jumping Into The Progress
There are certain things that you should note before starting the configuration process.
- There are two methods for setting up the extender. The first is a web browser method and the second is a mobile app method.
- A stable internet connection, electricity supply, and place of the extender play an important role. All of them determine the quality of the internet.
- Unbox the extender package carefully.
- Check if all of the items mentioned in the product description are in the box or not.
- It should contain an extender, an ethernet cable, a warranty card, and a user manual guide.
- The SSID and password are important to log into Netgear’s default account. So, you should collect them in the very beginning.
- Check your extender’s label or search for a slip in the device’s box.
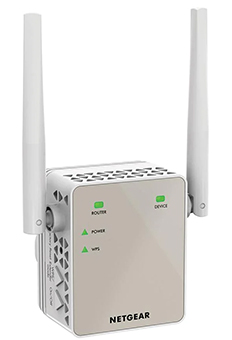
Different Lights of Netgear Extenders And Their Meanings
All of the Netgear extenders show different colors of lights and all of them indicate different meanings. Therefore, it is crucial to know about the properly. Further, it helps identify the problem with the extender.
Router Link LED
The connection between the extender and the router.
- Solid green – Best connection.
- Solid amber – Good connection.
- Solid red – Poor connection.
- No light – No connection.
Power LED
- Solid amber – The extender is booting.
- Solid green – The extender is powered on.
- No light – The extender is powered off.
Client Link LED
The connection between the extender and the computer or mobile device.
- Solid green – Best connection.
- Solid amber – Good connection.
- Solid red – Poor connection.
- No light – No connection.
WPS LED
- Solid green – WiFi security is enabled.
- Blinking green A WPS connection is in progress.
- No light – WiFi security is not enabled.
Let’s See What Is The Initial Setup
The initial setup stands for the basic activities that one has to do before starting the main procedure.
- Find an appropriate place for your extender. Place it halfway between the router and the dead wifi spots in your house.
- Make sure there are no walls, big objects, or any other physical obstructions to cause connection breakage.
- Electromagnetic devices emit such waves that interrupt internet connection resulting in poor internet quality. So, try to remove them. You can google the list of all household electromagnetic devices.
- Connect your extender with your router with an ethernet cable.
- You can connect these devices wirelessly too.
- You can search for your extender’s name in your device’s wifi settings.
- Further, click on the Netgear extender’s name and the connection will be successful in a few seconds.
Time To Use Your SSID And Password
The login process requires your SSID and password. You can do it in two ways.
Web Browser Method
- You can use any web browser for this but make sure it is updated to its latest version.
- Go to the search window and type the web or IP address into it.
- A set page will be opened on your screen.
- Click on the login option and then enter all the required information.
- Also, check the accuracy of your SSID and password. Because mistyping can lead to login failure.
- Tap on the Sign In button.
- Now give it a few seconds to process.
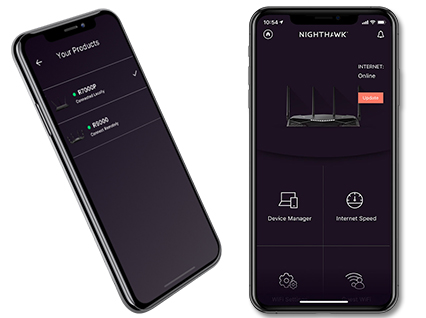
Mobile App Method
- Download the app from the Google Play Store or the App Store according to your phone.
- Make an account by entering your name and password if prompted.
- Choose your extender’s model and then click on the login option.
- Enter your SSID and password.
- Tap on the Sign In option.
- App-based login processes faster.
- Re-enter your login credentials in case the login fails.
Are Setup And Customization Of Settings Important?
Absolutely. Setup and customization are the core components of the configuration process. Although they mainly consist of some software changes importance remains the same. Here are the steps you need to follow to complete the installation:
- Go to the settings.
- First, change the SSID and password.
- Enter your previous login credentials before customization.
- Now manage other features like parental controls. Port forwarding, etc.
- Set up two-factor authentication and the question-answer too.
- You can set the limit of the devices connected to your extender.
- Click on Done.
- Go to your wifi settings and connect to the existing device.
- Reboot your device and enjoy a seamless internet connection.