Simplifying Reyee Extender Setup: Step-by-Step Instructions
Extenders are a major development in the world of networking. These magical devices are designed to extend the network coverage, boost signal strength, and enhance connectivity throughout your space. Although routers are also great devices, sometimes they are not enough to provide the best internet experience. In this situation, the demand for extenders has arisen.
However, everything works efficiently when things are done in the right manner. The setup plays a crucial role in the successful working of extenders. That is why, in this guide, we will explain the Reyee extender setup using different methods. Reyee is a leading brand that is well-known for manufacturing wifi devices like extenders, routers, and so on.
Supported Products
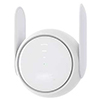
Different Components of Reyee Extender
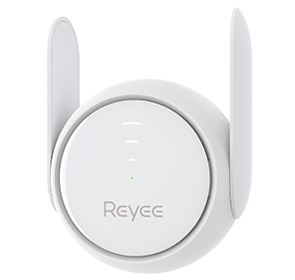
Get familiar with the different components of the Reyee extender and their usage. This will help you during the setup process.
- Main Unit: The main unit has indicator lights to tell the status of the extender, ports for connectivity, and buttons for power and reset functions.
- Antennas: These are very crucial in extending the range and strength of wifi signals. You can adjust antennas according to your needs.
- Ethernet Ports: The extender has ethernet ports that allow you to maintain a wired connection with the devices.
Various Methods For Reyee Extender Setup
Web-Based Method
Mobile Application Based Method
Pre-Setup Preparations for Seamless Installation
Choose the Right Place for the Extender
- Find out the finest place in your home or office for placing the extender. Ideally, the central location is considered the best.
- Try to avoid obstructions such as walls, furniture, and appliances that hinder wifi signal propagation.
- Always place the router and extender at a higher position like on a shelf or a table to enhance signal reach.
Find a Stable Power Source
- The extender needs a continuous power supply to perform well. So, identify a power outlet that has a consistent power supply.
- Try to avoid using extension cords if possible because they may cause fluctuations in power supply and affect performance.
- Make sure that the power outlet is easily accessible and cannot be controlled by any switch that could be accidentally turned off.
Assemble Your Setup Arsenal
- Gather all the necessary components that you require during the Reyee extender setup like an ethernet cable, power adapter, and user manual.
- Check that all the components are in good condition. Sometimes during packing components may get damaged.
- Keep additional devices nearby required like mobile devices or PCs for configuration.
Let’s Begin the Reyee Extender Setup Process
- Connect your extender to the power outlet to power it on. Wait for a few minutes and check the LED status. If it’s blinking it means your extender is getting adequate power supply. If not, cross-check the connection.
- If you are using the web-based method, then use the web browser to open the login page. If you are using an application method, then open your app and enter the login details to move further.
- Now, connect your device like a mobile or PC to the extender wifi network. Then you will be asked to enter the login credentials. Fill them and you will be directed to the setup page.
- If you are setting up the extender for the first time, you can use the default username and password from the user manual.
- On the setup page, do the basic and advanced settings and click on SAVE to apply the changes.
- Reboot the extender and observe the change in your network performance.
Contact Us for Technical Support
With these step-by-step instructions, you can easily perform the Reyee extender setup. If you face any difficulty at any point and are not able to do the setup procedure, call us immediately. Our tech support team is available 24/7. You can find the contact details below.
So, leave your connectivity worries on the Tech Support Hub team, we will handle everything as we have trained staff who are efficient in dealing with complex technical issues. We have several options for contacting us, you can mail your query to [email protected] or connect with us via live chat.