Rock Your Wi-Fi Game With Rockspace Extenders
Do dead zones and dropped signals cause hindrances in your work? Aren’t you able to get smooth internet connectivity in every corner of your home or office? Do not worry Rockspace has a solution for you. Now no more dropped signals, only seamless connectivity with Rockspace Extender Setup. Whether you are a student or a businessman, access to a super smooth internet is really crucial in today’s digitally interconnected world. A router’s signals cannot penetrate through thick walls and multiple floors; this is why you need an extender to extend the Wi-Fi coverage at your place. So without further ado let’s learn more about Rockspace extenders and their setup.
Rockspace And It's Extenders
We provide comprehensive solutions to optimize your wifi network’s performance. Check out what we offer to ensure you have a stable wifi connection:
- Rockspace extenders boost your Wi-Fi signal to eliminate dead zones in your home. A dead zone is an area where there is zero internet coverage.
- Rockspace Extender Setup supports dual-band Wi-Fi thus ensuring faster speeds and better coverage.
- Rockspace extenders are easy to set up and use, even for non-tech-savvy individuals.
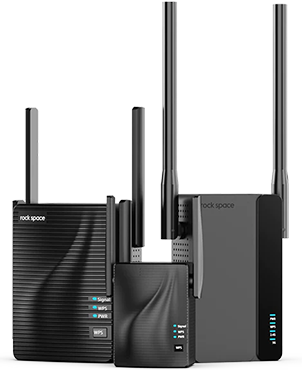
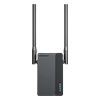
- They come with external antennas to improve signal strength and stability.
- Rockspace extenders have WPS (Wi-Fi Protected Setup) for quick and secure connections.
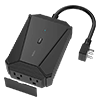
- Some models offer Ethernet ports for wired connections to devices like gaming consoles or smart TVs.
- They are compatible with most routers and can work with any standard Wi-Fi network.
- Rockspace extenders often have indicator lights to display the signal strength and connection status.
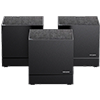
- They can extend Wi-Fi coverage up to a certain distance, depending on the model.
- Rockspace extenders are a cost-effective solution to improve Wi-Fi coverage and performance in your home.
Rockspace Extender Setup Methods
There are two methods to set up your Rockspace Extenders. If your host router supports the WPS method of setup then here’s the first method that you can follow:
WPS Method
- Plug the extender into a power outlet near your router. Wait until its Power LED turns solid as it will depict its working.
- Now locate the WPS button on the router and Press it.
- Within 2 minutes, press the WPS button on the extender.
- Wait until the Signal LED on the extender turns blue, which indicates a successful connection. And that’s it your Rockspace Extender Setup is complete.
Setup Through Web Browser
In case the WPS method doesn’t work or your router doesn’t support the above method of setup then you can set up the extender via a Web browser. Here’s the step-by-step guide to get you started:
- Before you begin plug in the extender into an electrical outlet near your router.
- Now, go to the settings of your phone or any device that you are using for the setup, and in the list of available Wi-Fi networks connect to the network named “rockspace_EXT”. If you are using your smartphone for the setup make sure that mobile data is turned off.
- Launch a web browser of your choice preferably go with Google Chrome or Mozilla Firefox. In its address bar enter http://re.rockspace.local or http://192.168.0.254 manually to get started.
- Create your username and admin password, and note it down for later use. Click Next.
- From the list of available wireless networks, select the Wi-Fi network that you want to extend. You’ll be asked to enter the password for the same.
- Once you enter the correct password a message of “Extended Successfully” will pop up on the screen.
- Once the Rockspace Extender Setup is completed you can relocate the extender to a new location and connect to the network.
Some Do's And Don'ts For Successful Setup
- Do carefully read the user manual or setup guide that comes with your Rockspace extender for smooth setup.
- Do test the Wi-Fi signal strength in different areas of your home after the setup is complete to ensure optimal coverage.
- Don’t place your Rockspace extender too far away from your Wi-Fi router, as it may result in a weak signal.
- Don’t use easy-to-crack passwords like birth dates and anniversary dates. Rather make a combination of letters, numbers, and signs to create a strong password to protect your network from outside threats.
- Do not rush through the setup process as it may lead to improper configuration. Follow all the steps with utmost precision.
- Also don’t forget to periodically update the firmware of your Rockspace extender for better performance and security.
Let's Wrap Up!
Rockspace Extenders can create magic in your home or office with their Wi-fi interconnectivity. They are affordable, trustworthy, and easy to set up. So no more delays in work or lags and buffering while watching movies or streaming games, only seamless connectivity and full bars throughout your place. So don’t wait further and grab one for your home and experience the magic of seamless internet at every step that you take.